
Organizations & Users
Creating, managing and using organizations
Organizations are collections of your users. How you set up your organization depends on how you want to define your workflow and organize your users.
You may choose to create single or multiple organizations depending on the size of your business and your business needs.
For example, if you are a small business with a simple structure, then creating a single organization for the business and assigning content to it should be sufficient for your needs.
However, if you are a large company that owns several smaller business units, or if you work with multiple different businesses and want to keep all your agent repositories, servers, cluster, jobs, schedules, tickets, etc. separated, creating multiple organizations is the way to go.
A user can belong to only one organization. You can not assign the same user to multiple organizations.
Note, that only Super Admin can create and delete organizations.
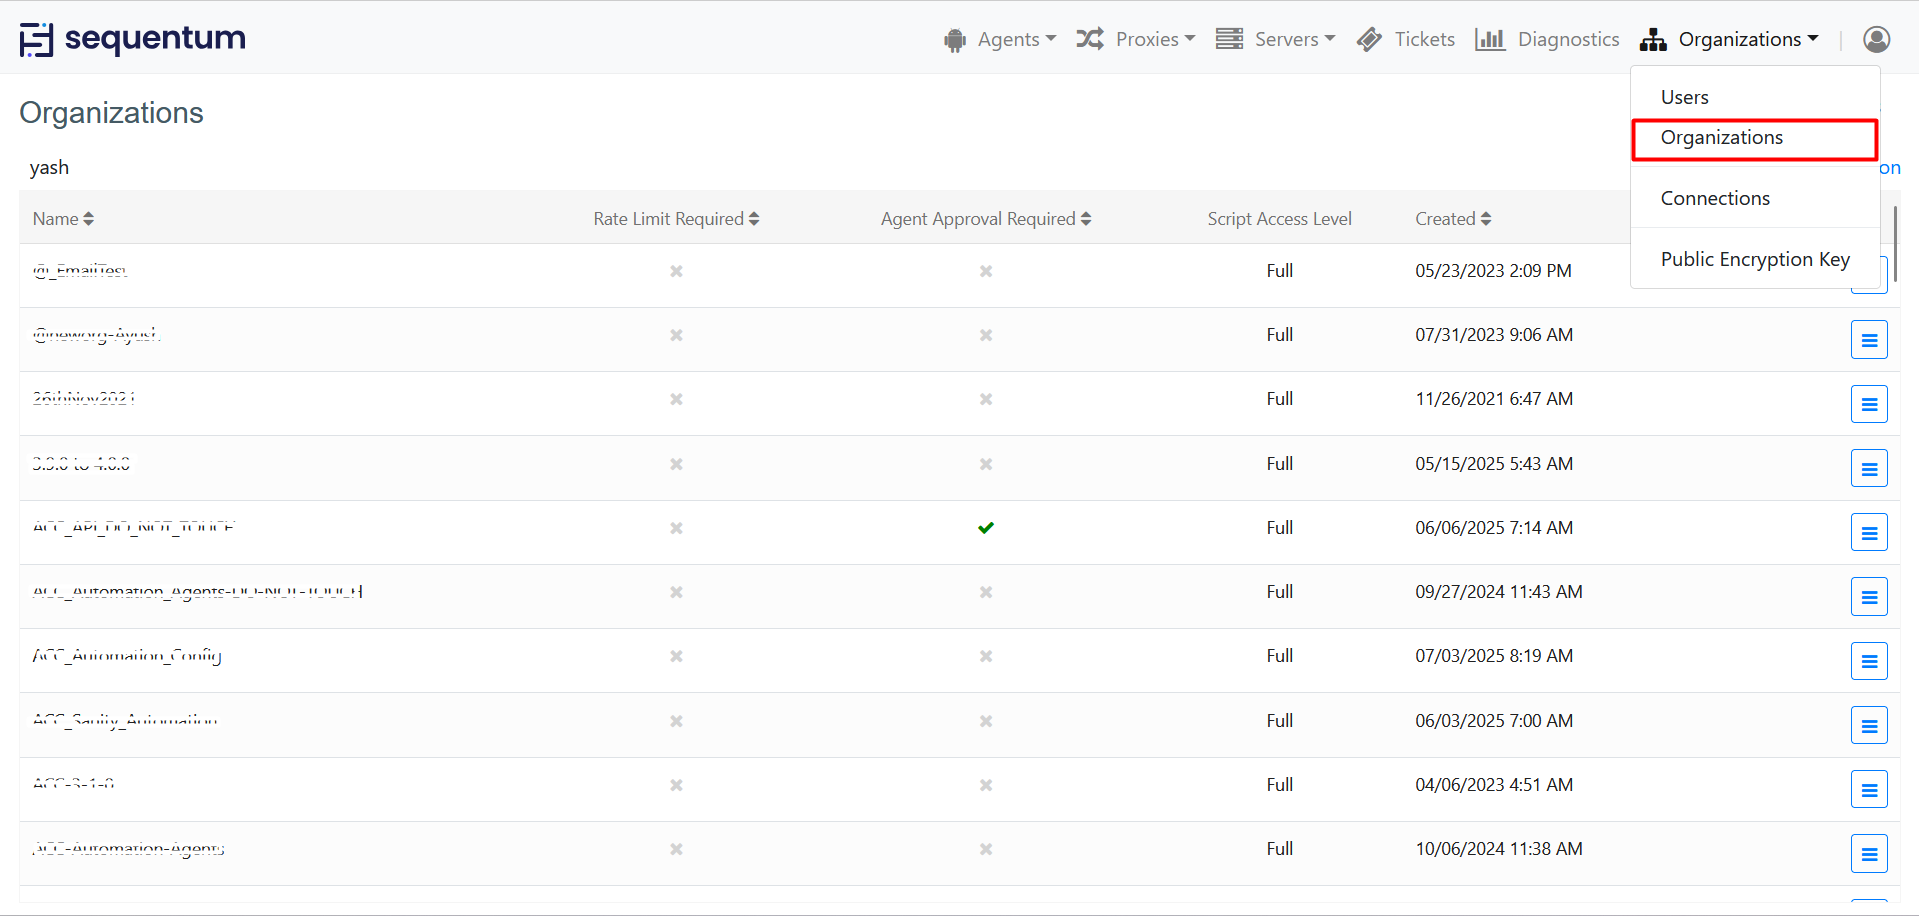
Navigate to Organizations -> Organizations. This displays the list of organizations that your Super Admin user currently manages.
Create First Organization
In the ACC, the first thing you have to do is to create an organization that you work for. By doing so, you actually become the Super Admin of the created Organization. Note, only users with the Super Admin role can create Organization(s).

Click 'New Organization' to Create New Organization.
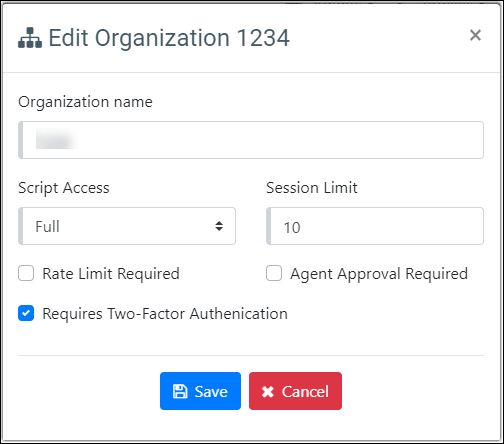
Enter the Organization Name and click the Save button.
Script Access: This feature allows the access control on the scripts being used in the agent, it may be C# or python scripts. The default value for the script access is "Full" which means all the scripts i.e. what we have today in the agents are accessible and will be used during the agent execution. The second option is "None", with this option none of the scripts will be accessible for the agents either it is an Export script or a simple script used for calculations i.e. no scripting at all, except Regular Expressions. If your agent is using any script and you are enabled "Script Access = None" then there are high chances that your agent will not produce the desired results.
Session Limit : This feature allows the user to set the default value of session limit within the organization. Although, By default the value of session is 10 but it can be changed by adding the value in the Session limit field. This session limit will be applied to the entire organization.For Example: If we add the “30” value in the “Session limit”. It allows the agent to run with 30 Sessions. If the user exceeded the session limit then it will display the error.

Rate Limit Required: Rate limits can be used to control how hard agents are allowed to hit a target website. For example, a rate limit can be added for a certain website and be configured to allow a maximum number of page loads over a given time period. Once you mark "Rate Limit Required" checked for an Organization then it means that agents cannot run without Rate Limits applied to the agents. So those agents can only be run which have an enabled Rate Limit.
For more information please read Rate Limits.
Agent Approval Required: This feature allows users to approve/disapprove their agents. If an agent is disapproved, all job schedules added will get disabled by default and cannot be enabled before the agent is approved.
A disapproved agent can still be run manually allowing users to check their agent execution and data before approving the agent to run through the Job Schedules. With the Agent Approval feature enabled new agents checked-in will be disapproved by default so you need to approve them specifically. Existing agents will be approved by default.
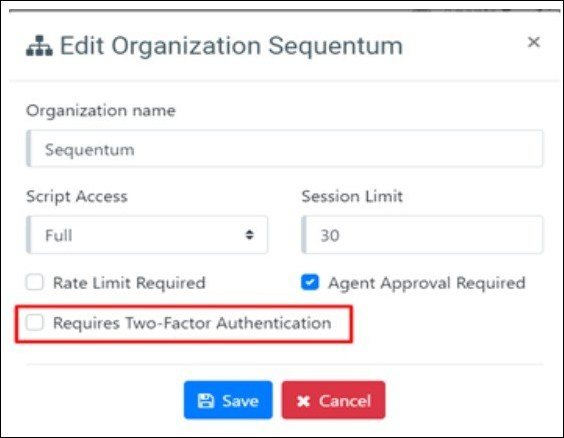
Requires Two factor Authentication : ACC gives you the ability to authenticate the user’s name and password via two factor authentication method and this will be achievable by google authenticator.
Process is known as Two factor authentication in which the user will scan their QR Code through google authenticator and then put in a 6-digit code to complete the login process.
Two factor Authentication feature has been implemented at Organization level so that all the users of this Organization will authenticate their credentials. For this feature every user must have the Google authenticator app in their android device.
When we try to login on a web within the organization in which Two factor Authentication feature is enabled then it will open the authentication page.
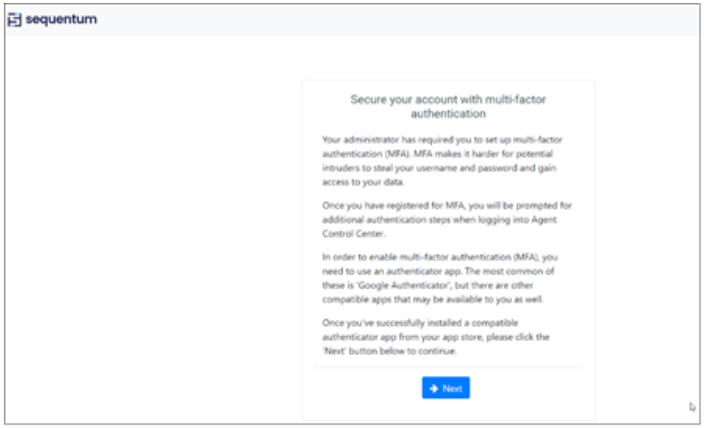
Now click on the next button and you will get the QR code window as displayed below -
Here you have to scan their QR code through google authenticator and you will get the 6-digit confirmation code on your android device.

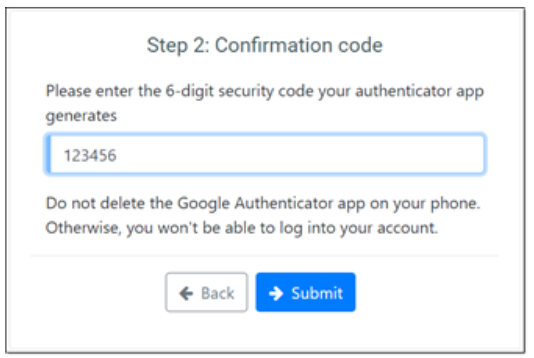
After entering the desired code, you will get the ACC dashboard page.
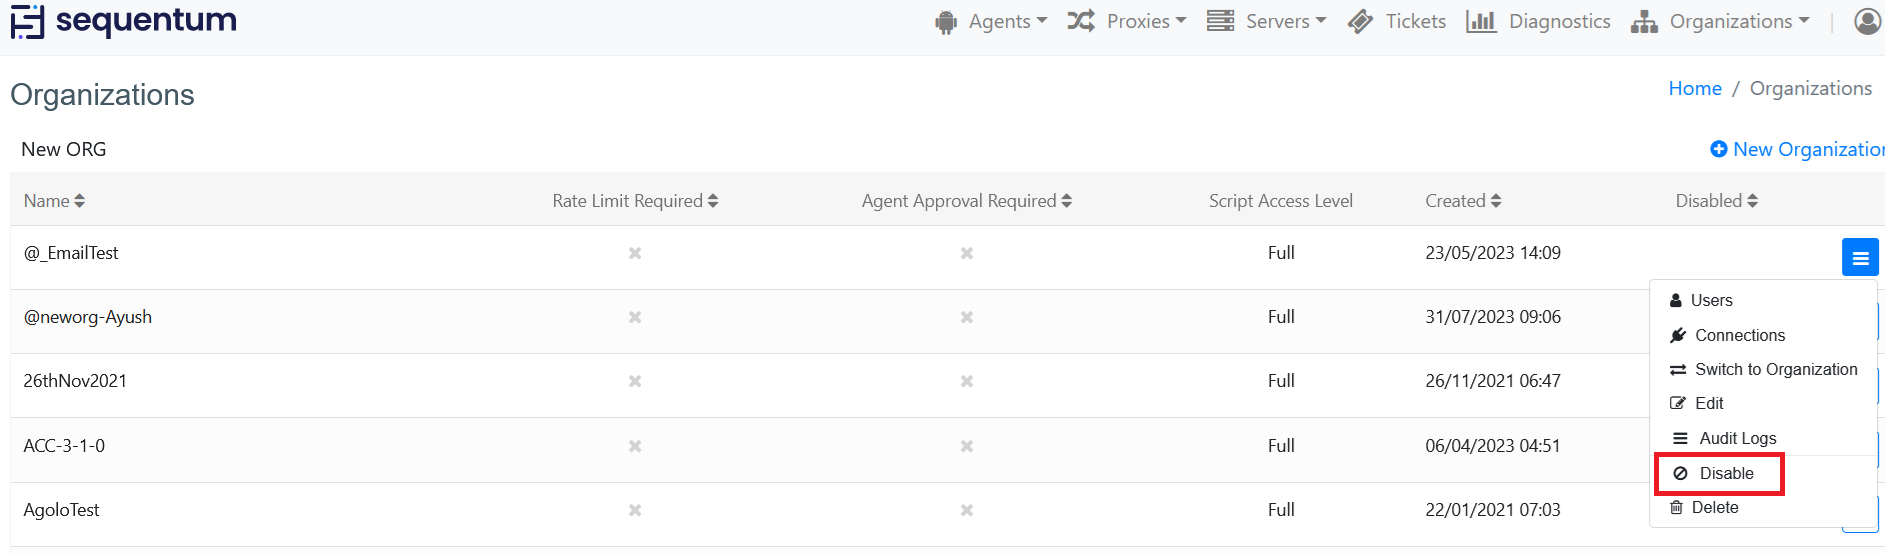
Disable Organization : The Disable Organization feature allows Users to deactivate an organization within the system. When an organization is disabled, all associated schedules, users, and API Tokens are also disabled. Users associated with the organization will not be able to switch into it until it is re-enabled. After an organization is disabled, a 'Disabled' flag will be shown in the Disabled column, indicating that the organization is disabled. Alongside this, an option to enable the organization will be available in the context menu.

Add Users to Organization
After the creation of the first Organization, you can start adding more users to it. The added users will then be notified via an email containing the invitation link that they can click to activate the account.

Click 'New User' Button to Add User to Organization
In the pop-up window enter Username, Password, Full name, Email. Mark the checkbox "Access all directories" if you wish to provide access to all the directories to any user.
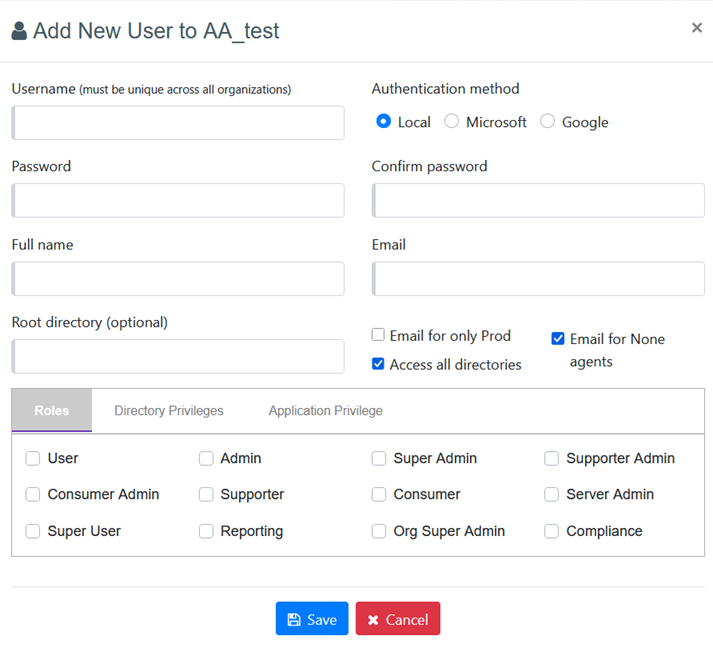
You can also apply one or multiple roles to a user. The following roles are available:
User: A "User" has the least privileges in the system. The user is allowed to create a directory for the agent repository but is not allowed to delete any directory or agent.
Super User: A "Super User" has privileges of use the ticketing module plus the privileges granted to the "User".
Admin: An "Admin" has all privileges within the Organization (Minus "Server Admin") he belongs to. He can create/edit/delete user or directory and has access to server and cluster (read-only).
Super Admin: A "Super Admin" can do anything within the system (across the Organizations) and have the highest level of privileges. This is also the very first user in the system, known as the 'Root' and help in creating different accounts in the system with any role.
Org Super Admin: An "Org Super Admin" acts just A "Super Admin" however its role is limited within the single organization.
Supporter: A "Supporter" is who analyzes the incoming tickets and respond or provide a solution to the ticket. They also can create/edit/update or assign tickets to other supporters or consumer users.
Supporter Admin: A "Supporter Admin" can delete the ticket(s) plus the privileges granted to a "Supporter".
Consumer: A "Consumer" has privileges to view the agents within the Directory, jobs, Run History page or can create/edit the tickets. Users with consumer roles are mainly involved in reporting the issues they are facing. They contact us by creating a ticket then wait for the solution from the Sequentum Enterprise team. They also can create/edit/update or assign tickets to the "Supporter" or other "Consumer"..
Consumer Admin: Can delete the ticket(s) plus the privileges granted to a 'Consumer'.
Server Admin: A "Server Admin" can manage server related tasks.
Reporting: The Reporting Role is provided along with Super Admin Role, In addition, the user can receive email alerts across organizations.
Org Super Admin: Organization Super Admin has all the access and Privileges within the same Organization.
Compliance: Compliance User has the least Privileges. He has only the view access to Directory Level within the same Organization.
For more information of all the Actions of each User, Please visit Users & Roles.
Organization Audit Log
Audit Logs is a key feature in Agent Control Center which tracks and monitors all the events and activities performed by the user or system.
Organization Audit trial page contains information regarding User Name, Operations, Description, Contents, and Created. For more details please read Organizational Audit Log.
Users Management
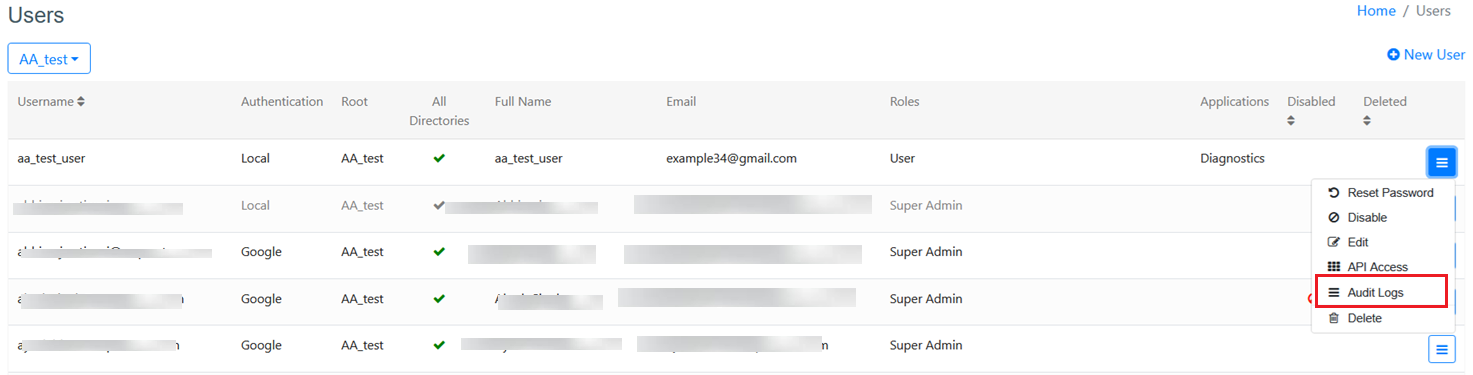
Admin can manage users with the organization and perform the following actions: add a 'New User', 'Reset Password', 'Disable' other users' access, 'Edit' their profiles and permanently 'Delete' them from the users' list, manage/revoke 'Directory Privileges', grant 'API Access'.
Super Admin can perform the same actions as Admin. However, unlike Admin, Super Admin can manage users across all the organizations if there is more than one.
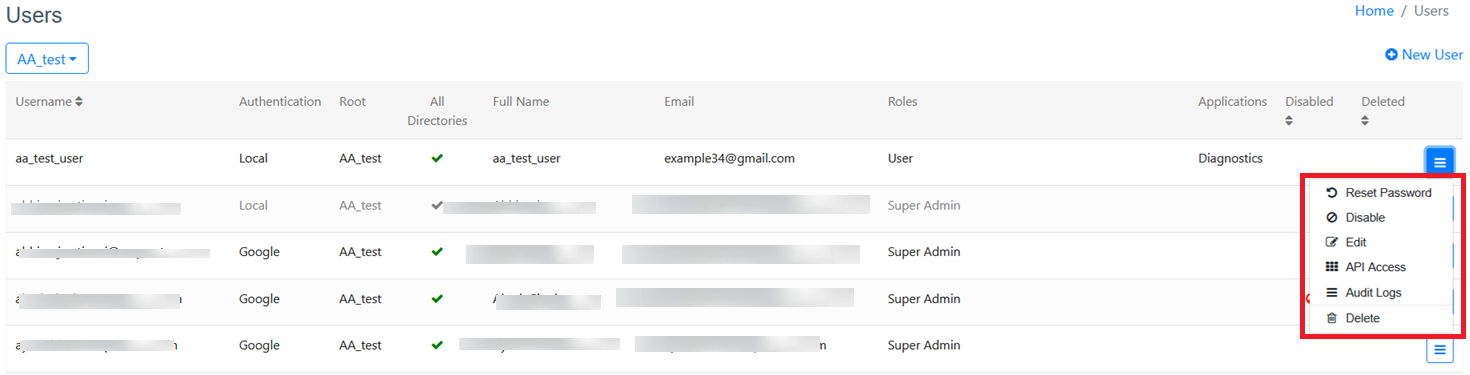
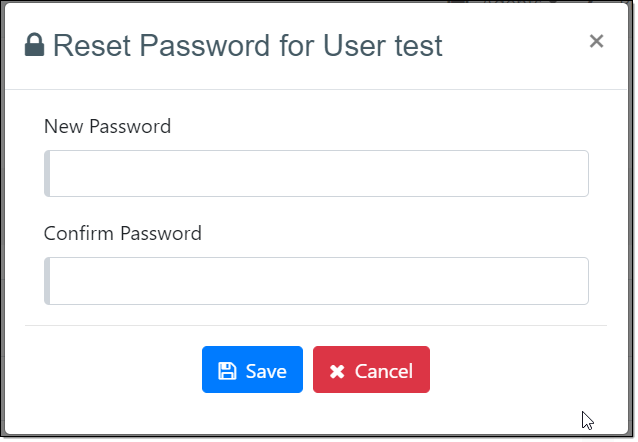
Reset Password: Admin can manage user’s login credentials like passwords and can change whenever there is any requirement.
Disable: You can disable the user to access the Agent Control Center using this option.
Click Enable if you again want to enable that user.
Edit: Edit user provides the option to Edit users details, Roles, Directory and Application privileges.
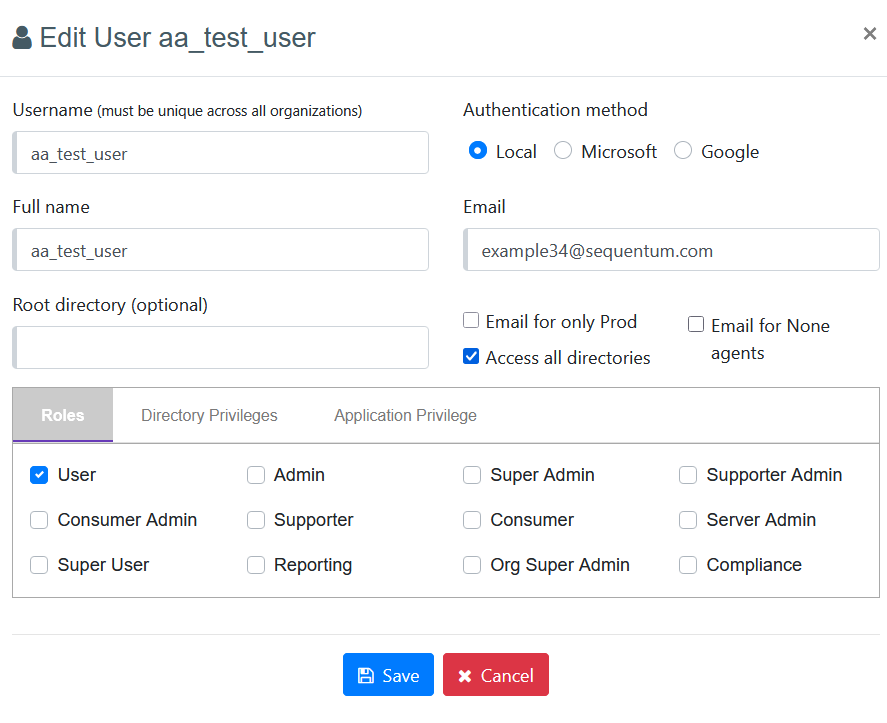
Email for only Prod : The "Email for only Prod" checkbox on the Add New User page allows users to control environment-specific email notifications. When selected, the user will receive email notifications only from the Prod environment runs/jobs, excluding Dev and QA. If left unchecked (default), the user will receive notifications from all environments: Prod, Dev, and QA

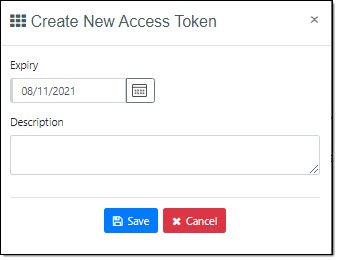
Access Tokens: Access Tokens page shows the access tokens added, Description and Expiry of the tokens.
Also allows you to add access token by clicking “Add access token”.
Audit Trail: User Audit trail records all the user activities.
Delete: You can use this option to delete the user from AgentControlCenter. Although the user is not hard deleted and can be recovered by the Super Admin by using the Recover context menu option. The Recover option is only available for Super Admin Role. The deleted user is not displayed to any other role and the same is grayed out for the Super Admin on the Users page.

User Audit Logs
Audit Logs is a key feature in Agent Control Center which tracks and monitors all the events and activities performed by the user or system. The user Audit trial page contains information regarding User Name, Operations, Description, Contents, and Created details. For more information please read User Audit Logs.
Directory Privileges
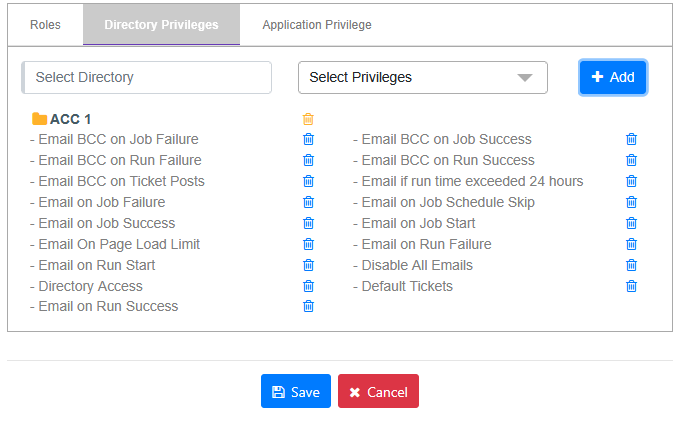
Super Admin and Admin can revoke the existing Directory Privileges that were set earlier. Please read here on how to set up Directory Privileges for a user.
In order to view or revoke Directory Privileges, you need to select a user and then select 'Directory Privileges' action from the context menu. There you will be able to see all the Directory Privileges for that user if there are any and use the 'Delete' button to remove specific privileges.
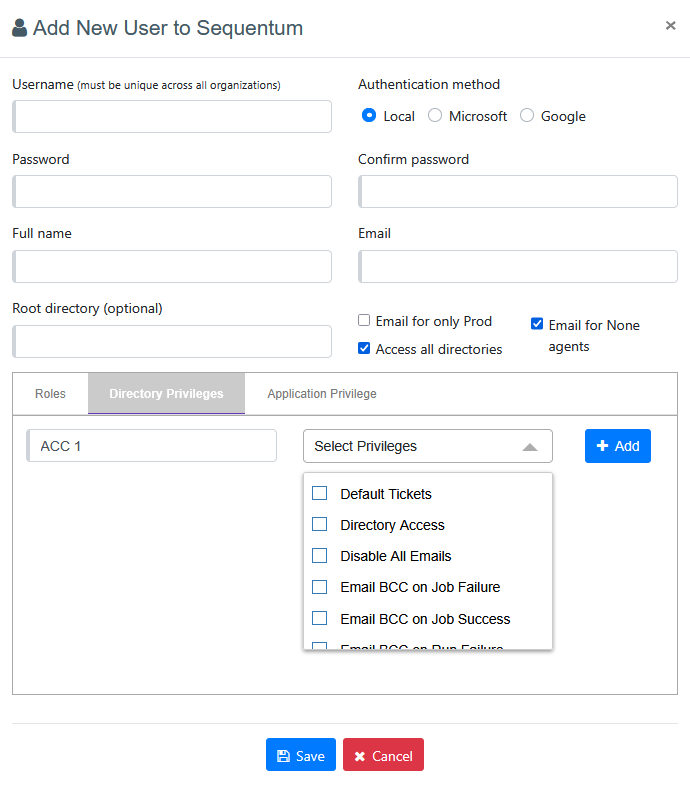
Steps to provide access to directories and privileges.
Select the subdirectory.
Provide the desired privileges.
Unmark the checkbox "Access all directories" otherwise the user will have access to all the directories.
Click on the Save button.
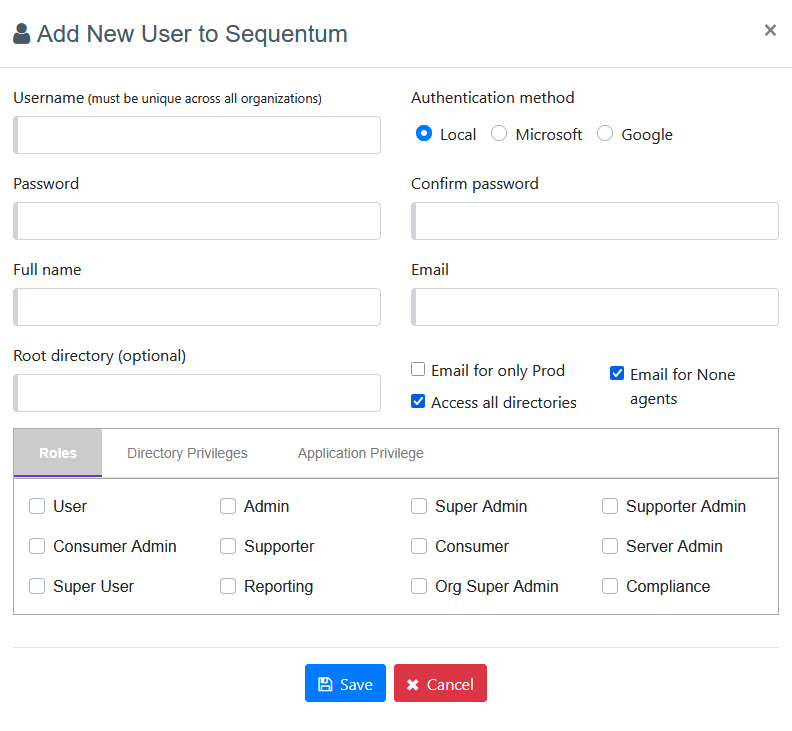
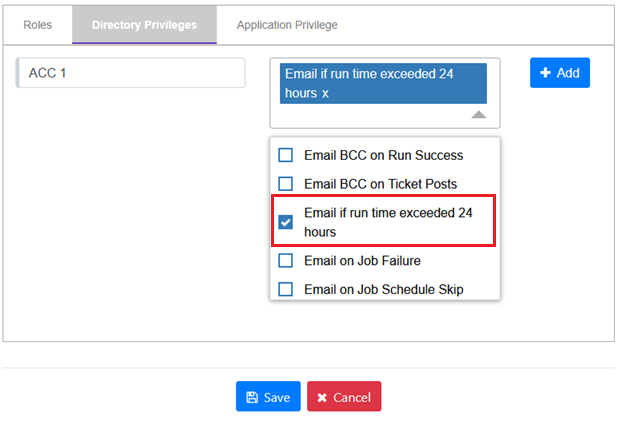
We have an option to get email/ticket notifications if agent exceeded 24 hours of the run time. We can get this by enabling the Privilege “Email if run time exceeded 24 hours” from the Add New User/Edit User window on the Users Page.
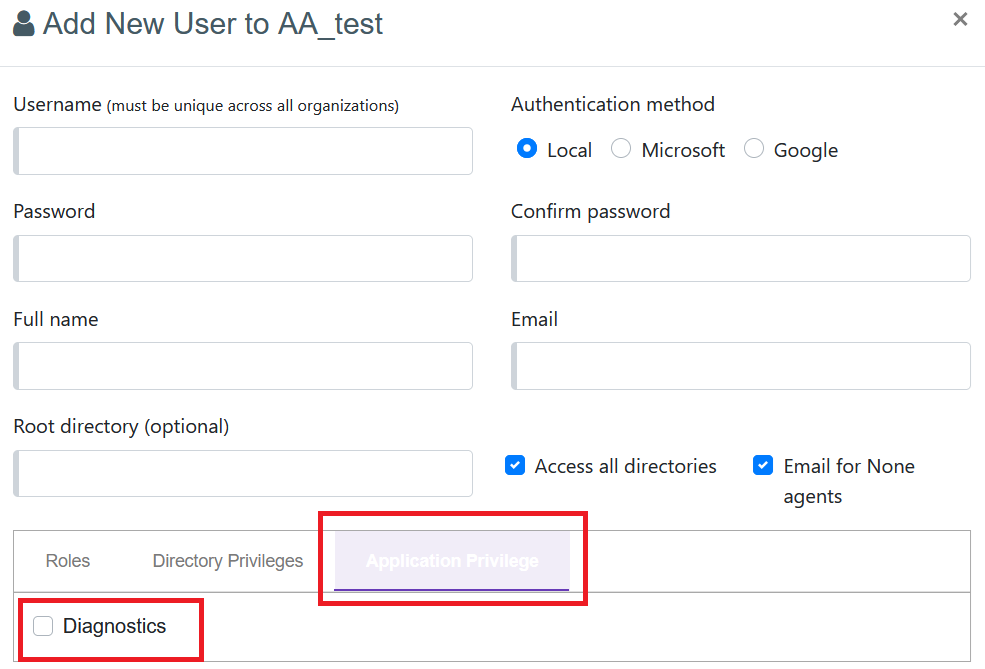
Application Privilege
The "Application Privilege" tab has been added to the "Add New User"/ “Edit User” window to provide enhanced control over user permissions within the ACC. This tab is accessible exclusively to Admin-type users (including Admin, Super Admin, Server Admin, or Org Super Admin). It allows these users to grant specific privileges related to various ACC functionalities to other users. For instance, there will be a checkbox labeled "Diagnostics" that allows granting access to the diagnostics page. To provide this access, simply check the box next to "Diagnostics." Ensure to save the changes before proceeding with adding the new user or existing user. This ensures that only authorized personnel with the appropriate administrative privileges can manage and grant access to critical ACC features, maintaining security and control over user permissions effectively.
API Access
The ACC provides access to basic functionality through an API. Super Admin and Admin can grant API Access to users. For more information please read API Access.
Connections
Connections in Sequentum Enterprise are used to connect to distribution targets, such as AWS S3 or Azure Storage. Connections are created in Sequentum Enterprise and can be uploaded to the Agent Control Center. When a connection is uploaded to the Agent Control Center, it's assigned to the organization of the user uploading the connection, and it's automatically deployed to all Sequentum servers assigned to that organization.
For more information please read Connections.