
Exploring the Menus
File Menu
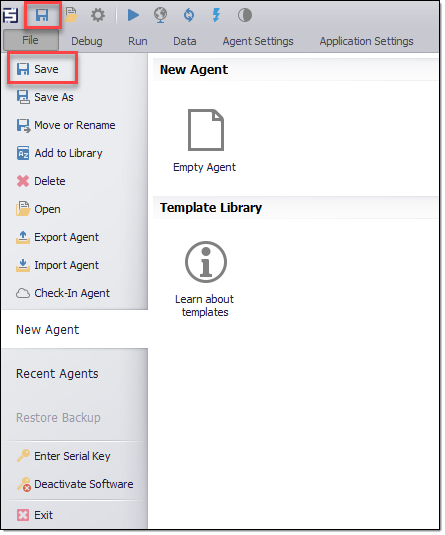
Save: To save the progress that is made on your agent click the Save icon that is visible on the Top Left Corner of the window right above the File Menu Icon or you can click File Menu and click the Save.
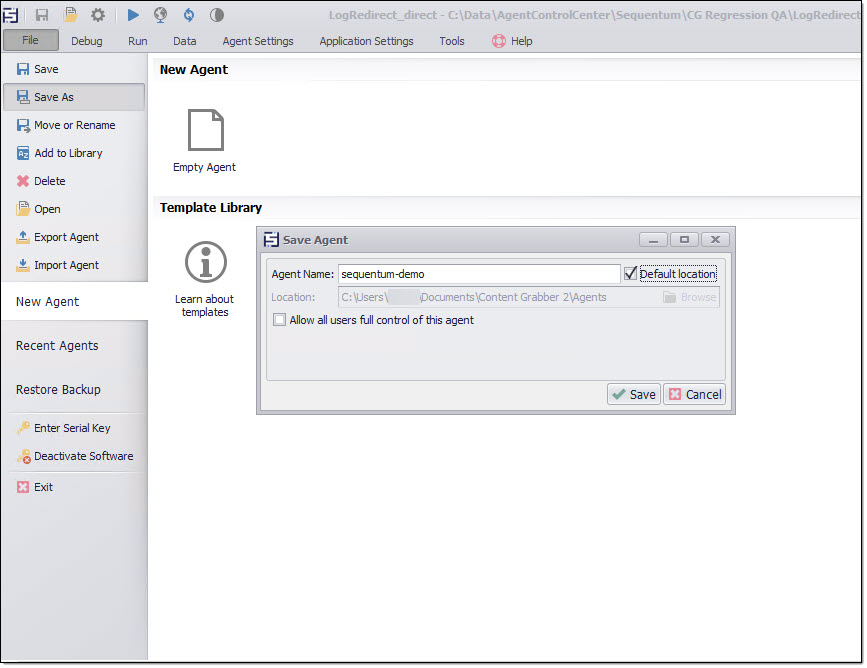
Save As: Save As allows you to create a copy of your agent. Go to File Menu, click Save As to make a copy of the agent.
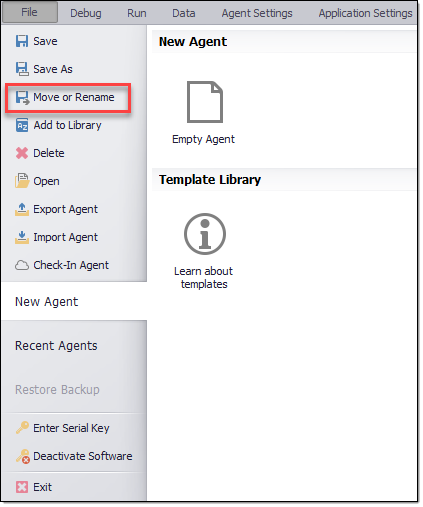
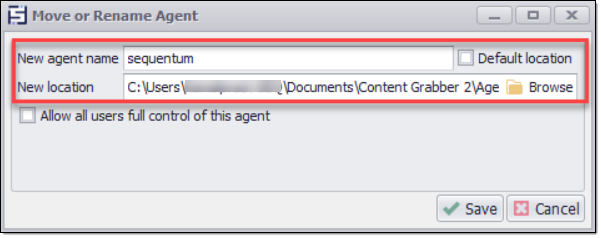
Move or Rename: In order to change the name and the location of your agent use the Move or Rename option. Go to File Menu, click the Move or Rename a prompt box appears where you can enter the new name and location of the agent .
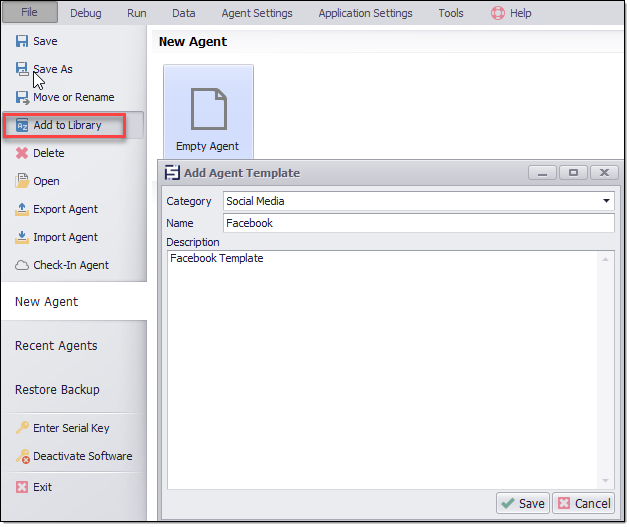
Add to Library: Sequentum Enterprise and Desktop contains an agent template Library and Command template Library for easy reuse of agents and commands.
When creating a new agent, you can derive the new agent from an agent template. You can add any of your agents to the template Library by just right-clicking on the agent in the Agent Explorer window and selecting Add to Agent Template Library from the Context Menu.
For complete details, please check the article Command Library
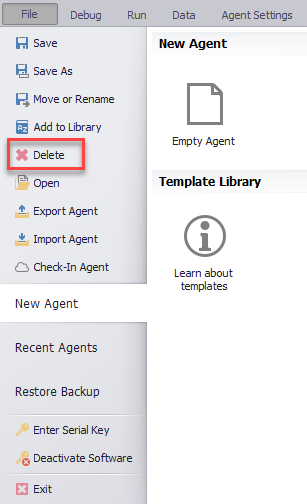
Delete: In order to Permanently delete an agent, navigate to File Menu click the Delete. A dialogue box will open subsequently click Yes and the agent will delete permanently.
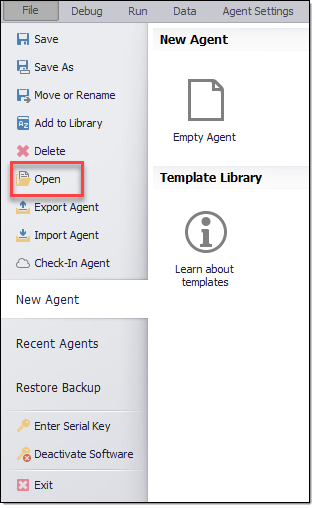
Open: In order to open an existing agent go to File Menu, click the Open option. A new window opens that contains all your existing agents. Click the agent and it will open in the current Sequentum Enterprise Window. If you are already working on an agent, then please make sure you save the current changes, before opening the new agent.
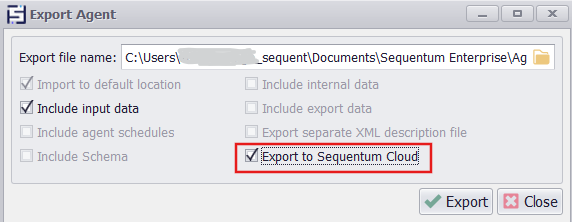
Export Agent: To export your agent, make sure you save your agent and keep it open. Then from the File menu, select Export Agent. The following Export Agent pop-up window will appear on your screen.
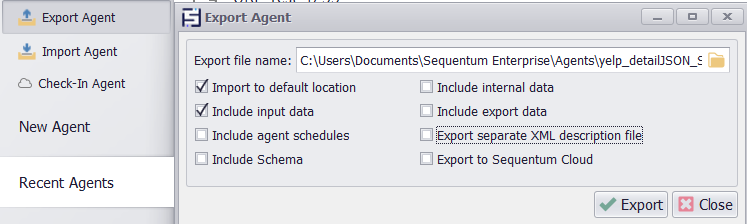
Sequentum Enterprise's Export Agent facility enables you to package up all the associated files and folders into one file in a manner that is similar to a zip file. The default location for where agents are exported is the Documents > Sequentum Enterprise > Agents folder on your PC.
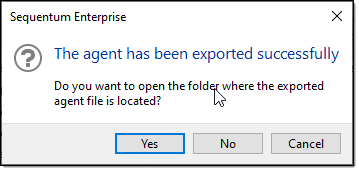
once the agent is exported it shows you a confirmation dialog box appears asking if you want to open the exported agent file location.
For complete details, please check the article Exporting & Importing Agents.
The Export to Sequentum Cloud option allows you to export agents from Sequentum Enterprise to Sequentum Cloud.
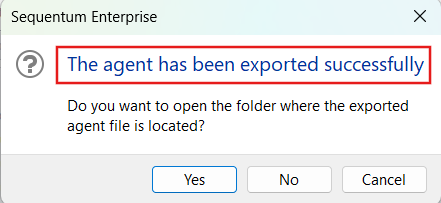
Once the export is complete, a pop-up message saying "The Agent has been exported successfully" will appear and a ZIP file (CloudExport.zip) is saved in the agent folder or a custom path.
For complete details, please check the article Converting Sequentum Enterprise Agents to Sequentum Cloud Agent Text
Import Agents: You can only import agents that have previously been exported from Sequentum Enterprise and previous Sequentum Enterprise and Desktop licenses.
To do this, select Import Agent from the File menu. The following Export Agent pop-up window will appear on your screen.
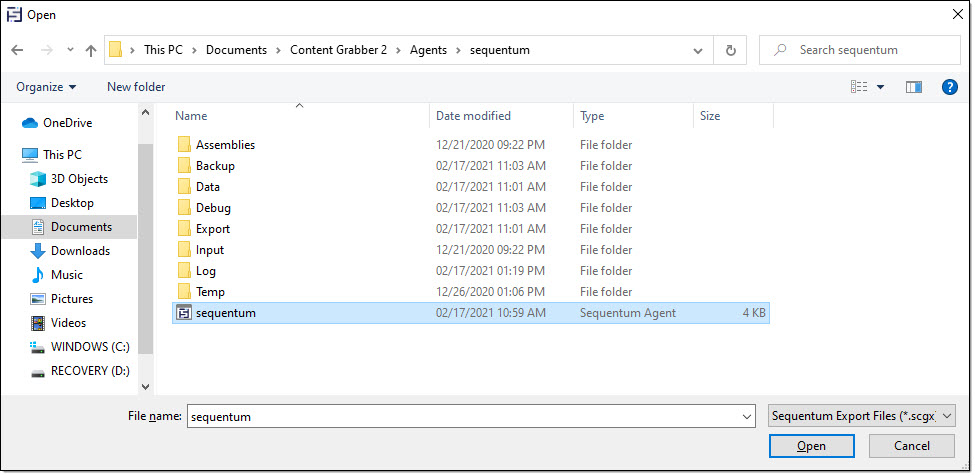
Simply select the agent file you wish to Import and then click the Open button. All the folder structures and associated files for the agent will then be unpacked into the Documents folder on your machine.
For complete details, please check the article Exporting & Importing Agents.
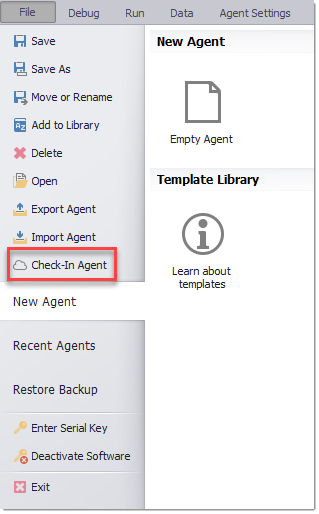
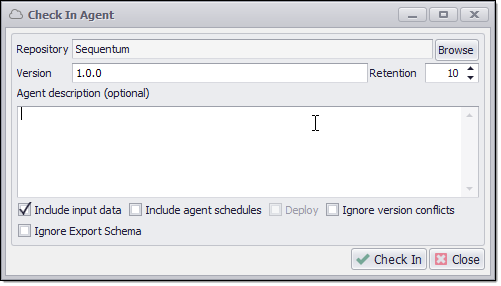
Check-In Agent: This feature is used to save different versions of your agent in the agent repository. First login to the Agent Control Center. Then click File Menu and then click the Check-In Agent. A prompt box opens where you can input the version number, also select the location in the repository. If needed you can also add a description that should indicate details about what has been implemented in this particular version of the agent. It is always recommended to add a relevant Description. Click Check In and your agent is checked in the repository.
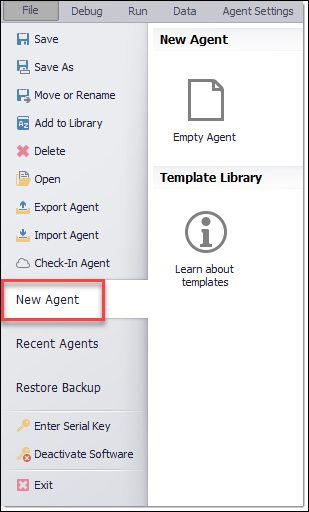
New: Let’s get started with opening and creating a new agent. In order to do so, you can simply double click the Sequentum Enterprise Icon and go to the File Menu available at the top left corner. Next, click the New Agent option and then click Empty Agent under the New Agent this will open a new agent window where you can start building your agent.
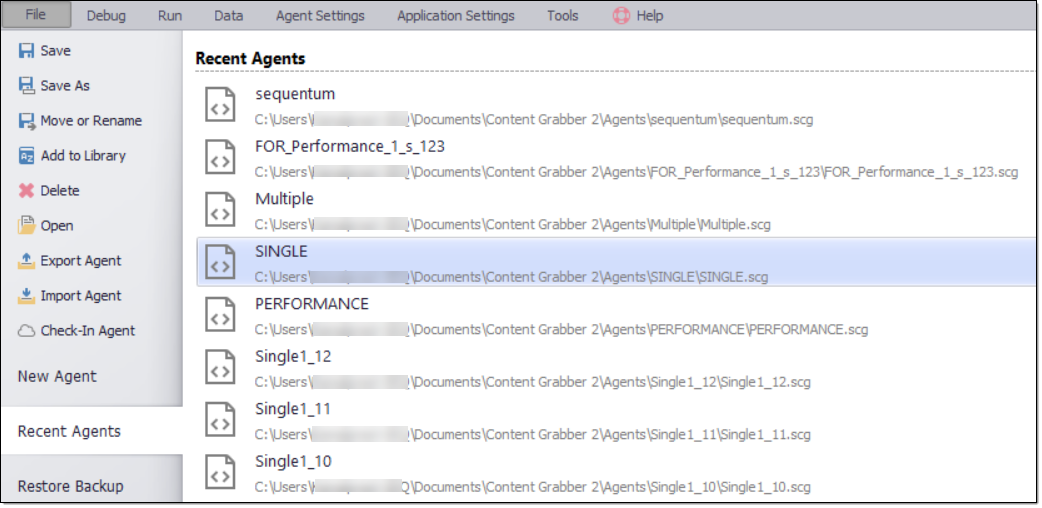
Recent Agents: Open Sequentum Enterprise click File Menu, navigate to the Recent Agents Tab. Here, it opens a list of all recent agents that have been worked upon.
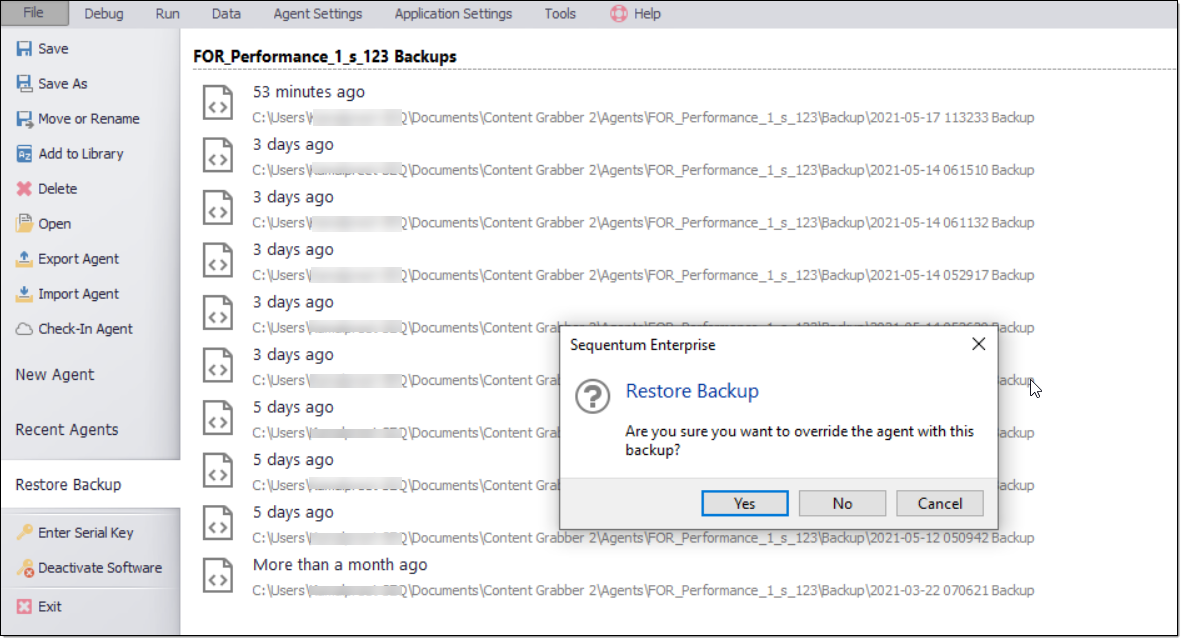
Restore Backup: Restore Backup feature shows you the list of modifications done on that agent date wise. If you have any requirement to switch to a particular version of that agent, just select that version from the agent backups.
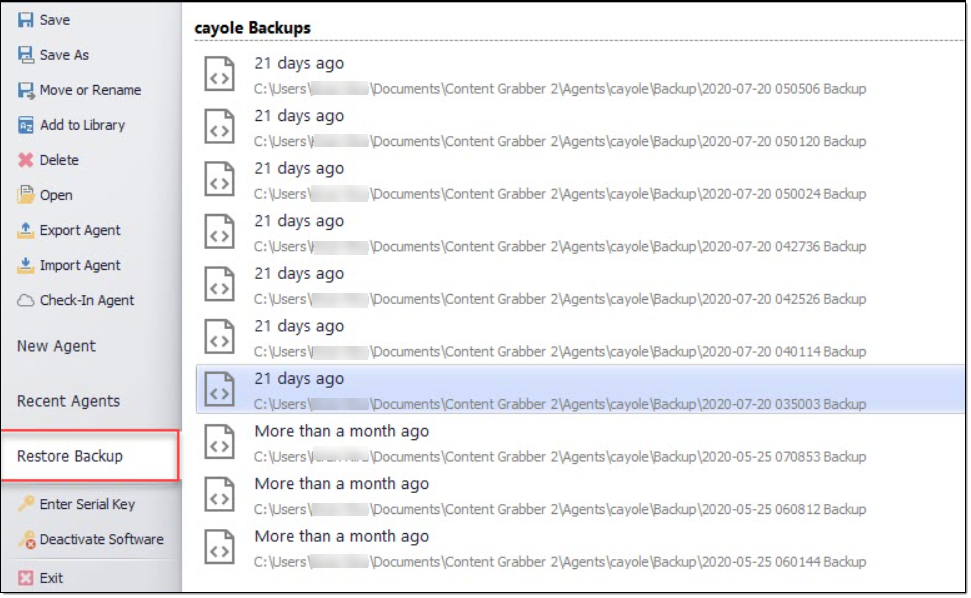
Click the version of the agent that you want to backup, a confirmation dialog box of Restore backup appears.
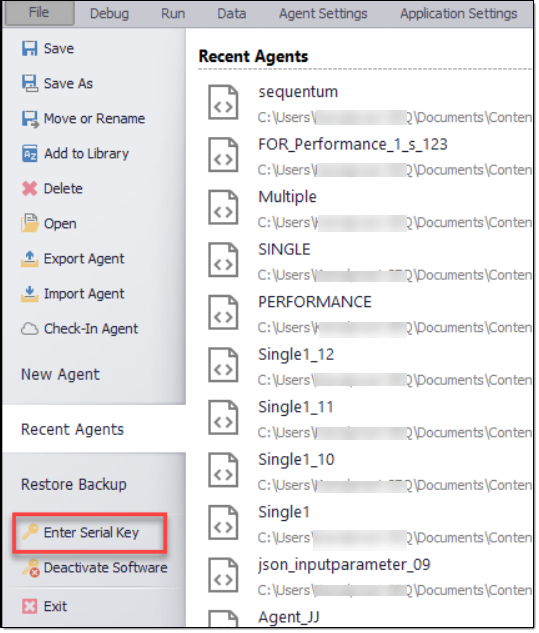
Enter Serial Key: Once you download Sequentum Enterprise, to access the software you will need a Serial Key. Click File Menu then click the Enter Serial Key which allows you to enter the license key or serial key. You are thus set to build agents now.
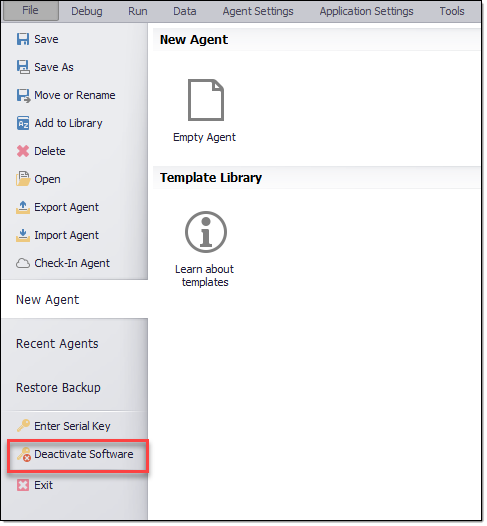
Deactivate Software: click the Deactivate Software (which is at the bottom of the File Menu options) in the File Menu.
Your software will be deactivated and you will need to re-enter or enter a new license key in order to activate the software and build agents again.
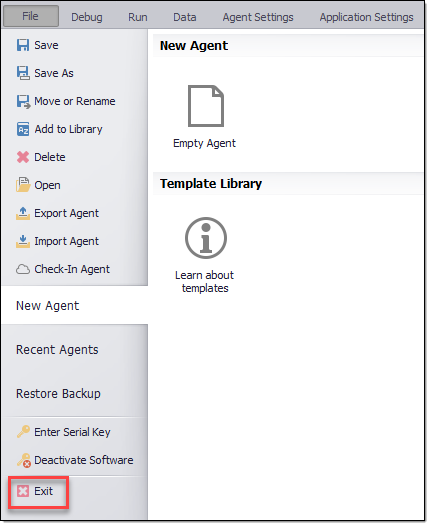
Exit: Go to File Menu and click the Exit. This will allow the user to exit Sequentum Enterprise.
Debug menu
An agent Debugger is an essential tool when trying to locate and correct issues in an agent. Running an agent through the debugger is normally the first thing you do after you have built your agent.
Start: Start Debugging from the beginning of the agent.

Pause: Pauses Debugging and allows modifications of the agent.
Adding or removing Commands is not possible while Debugging is paused because this would change the internal data structure.

Stop: Stops Debugging the current command.

Next Command: Executes the Next command and then pauses the debugging.

Next Action: Executes the Next Action command and then pauses debugging.
An action command is a command that executes an action such as loading a new page.

Debug Speed: Sets the Debug speed to slow down or increase the debugging speed.
You can slow down the debugging speed to help you see what is happening when the agent is running.

View Export Data: View the data extracted by the agent after debugging. You must debug the agent before you view the extracted data.

Open Export Folder: Open the File folder where exported debug data is saved.
If the agent is downloading files you will need to look directly in this folder to view the downloaded files.

Open Exported Spreadsheet: Opens the exported spreadsheet or CSV file.
Sequentum Enterprise cannot export to a file that is open, so you must remember to close the spreadsheet before debugging the agent again.

View Internal Data: Sequentum Enterprise stores internal data in the database - which contains all the data extraction elements for any agent, but also contains the data which corresponds to the settings for the agent properties.
You can always view the internal data by clicking the Data > View Internal Data menu.

Enable Logging: This feature turns on Logging while Debugging the agent.

Log HTML: Logs the full HTML of all pages in addition to other log details.

View Log: View the debug Log after debugging the agent.
Log data will only be available if logging is enabled while debugging.

Run menu
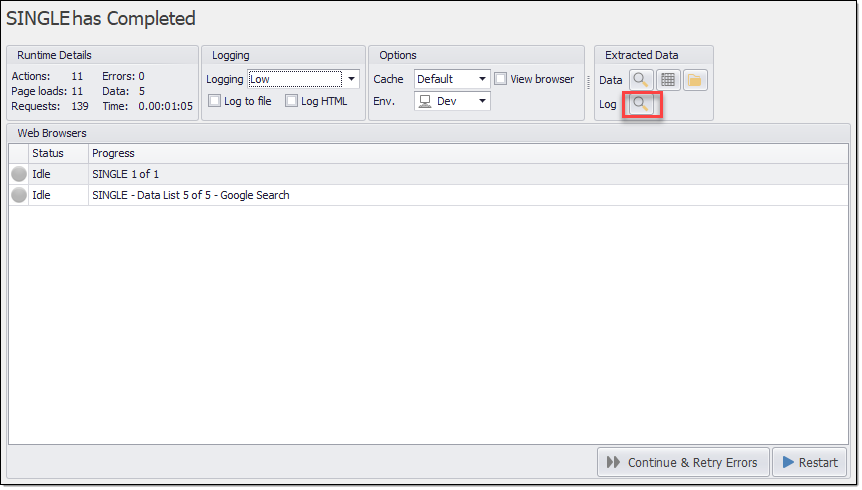
Page Loads: When an agent is executed, the Run Action command gives details and raw idea of the progress of the agents run. Page Loads show the number of pages crawled during the execution process.
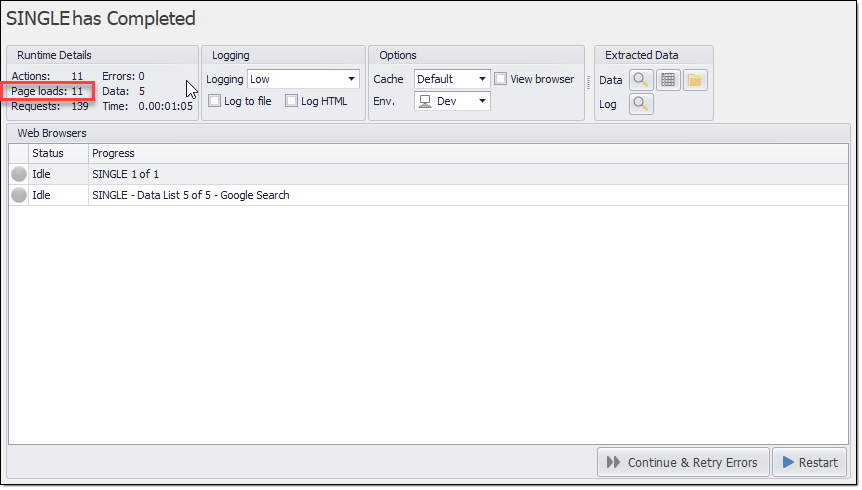
Requests: Requests in the Run Action Command are the combination of all page loads and URL requests that pass when a page in the agent is set in Dynamic Browser.
Note: If all the pages in the agent are other than Dynamic Browser i.e. either in Html or Json parser the Request counts and Page Load count will always remain the same.
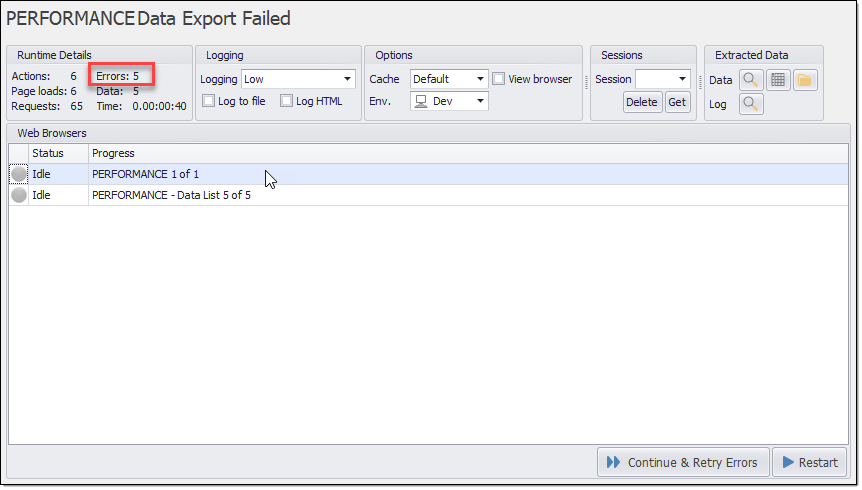
For Example: In the below screenshot, the agent is configured with one page in the dynamic browser and rest configured in json. So, the count of Page Loads and Requests are different in this scenario.
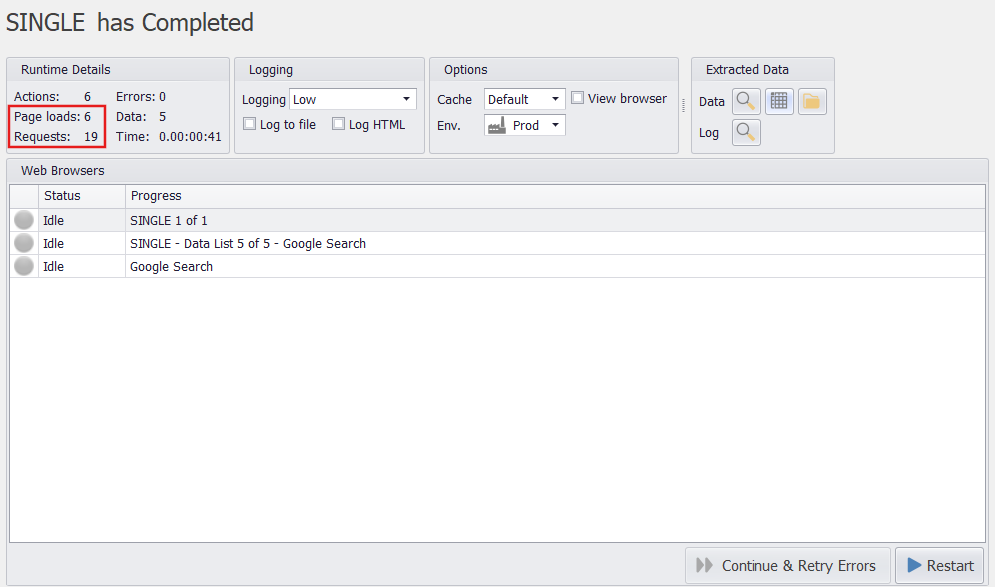
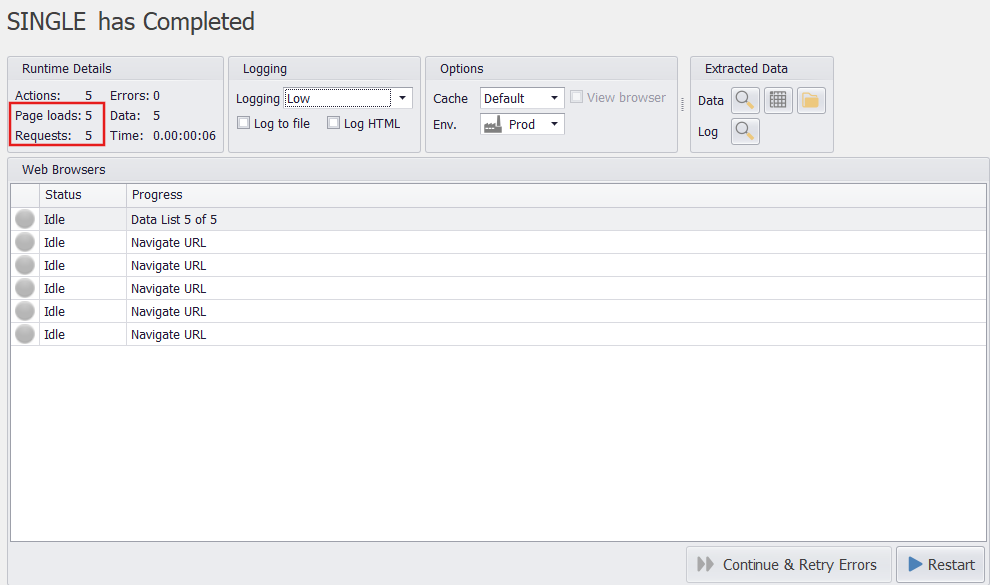
The following screenshot is an example showing the same count for Requests and Page Loads as there is no usage of Dynamic Browser but only JSON or HTML browser is used.
Errors: Errors in the Run Action command shows the number of issues or errors faced by the agent during its execution.
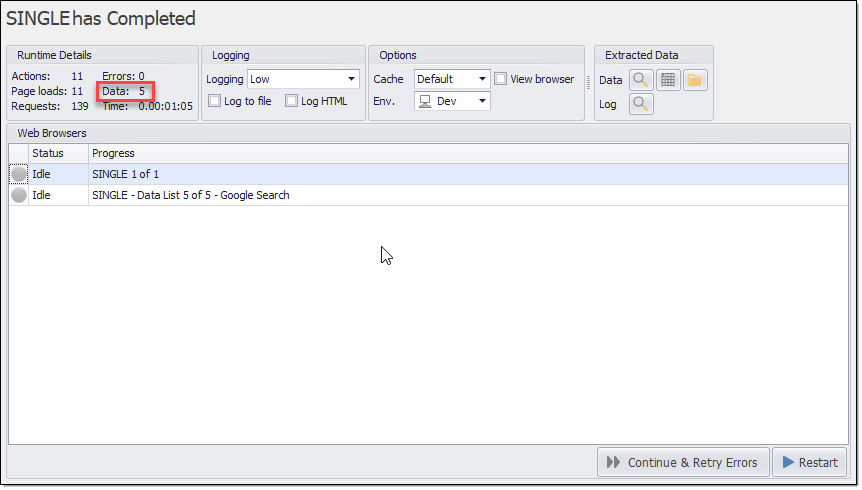
Data: It represents the count of data that has been extracted. Data entry is defined by setting the option to Increase data count on any command.
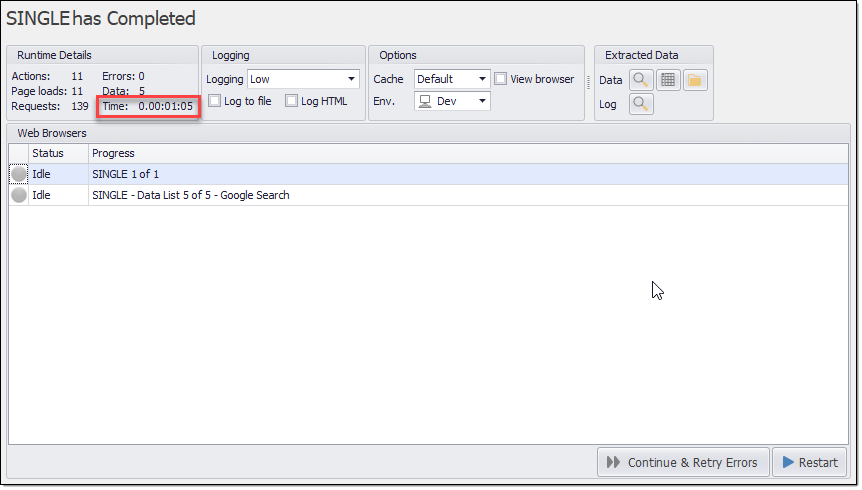
Time: The Time on Run Action command represents the time take by an agent to complete the data extraction. The representation is as follows 0.00:00:00 i.e. Days.Hours:Minutes:Seconds.
Logging: The Logging feature is available in the Run Action Command where you can set it to None, Low, Medium, High.
None: When logging is set to None no errors or any kind of ongoing processes are shown in the logging window.
Low: When Logging is set to Low, it only shows the type of errors the agent faced during its execution.
Medium: When Logging is set to Medium, it shows the errors as well as warnings the agent faced during its execution.
High: When Logging is set to High, it shows every single detail of the agent during its execution ranging from the process of Agent starting, Proxy Rotation, Errors, URLs Etc.
Log to File: The Log to File checkbox allows you to log the errors and other information of the agent process into a text file. So, that you can open and check the logs whenever required
Log Html: The Log Html checkbox allows you to log the Html content along with messages and URLs.
Cache- Default/ Read/ Write/ None: This feature is available in the Run Action Command. It allows you to save the cache of the crawled data in the agent cache folder. You can set the cache to Default, Write, Read or None as per the agent requirement.
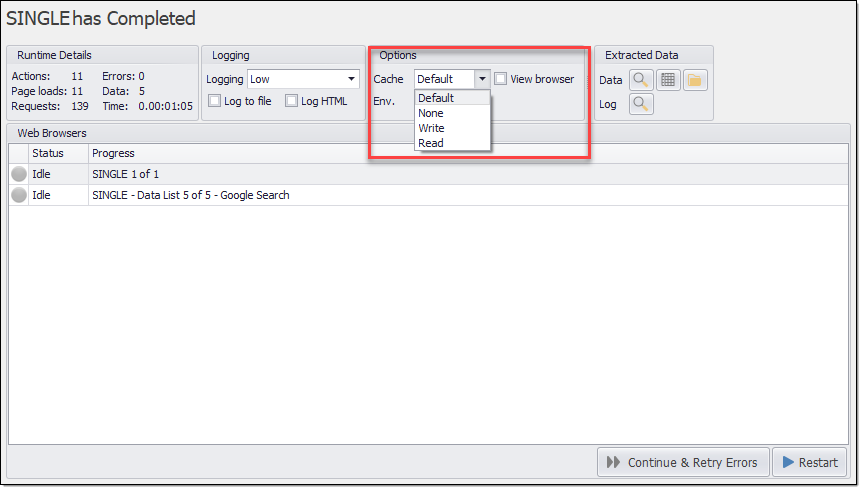
Cache-Write: This feature allows you to create a cache file of the crawled data and save it to the agent cache folder which can later be used.
Cache-Default: This feature behaves the same as write cache. If the Write Cache property in the Agent Property is set to True it creates a cache file and if the property is set to False no cache file is created.
Cache-Read: This feature allows you to read the cache file from the cache folder that has been created in the previous execution of the agent in order to save the execution time and unnecessary hitting of URLs.
Cache-None: When the cache is set to None, the agent neither reads nor writes any cache during the agent execution.
Environment-Prod/Dev/QA:
Prod- This feature is available in the Run Action Command. This allows you to set the Environment of the agent to Production and it means the agent is ready to deliver data after Development and QA. This allows you to post notification on acc, deliver data to remote storages etc.
Dev- This feature is available in the Run Action Command and allows you to set the agent Environment to Development and it means the agent is still in the development phase and cannot notify or deliver data.
QA-This feature is available in the Run Action Command and allows you to set the agent Environment to QA and it means the development is done and the agent is in the QA phase where it cannot post any notification on its execution or deliver any files to remote storage.
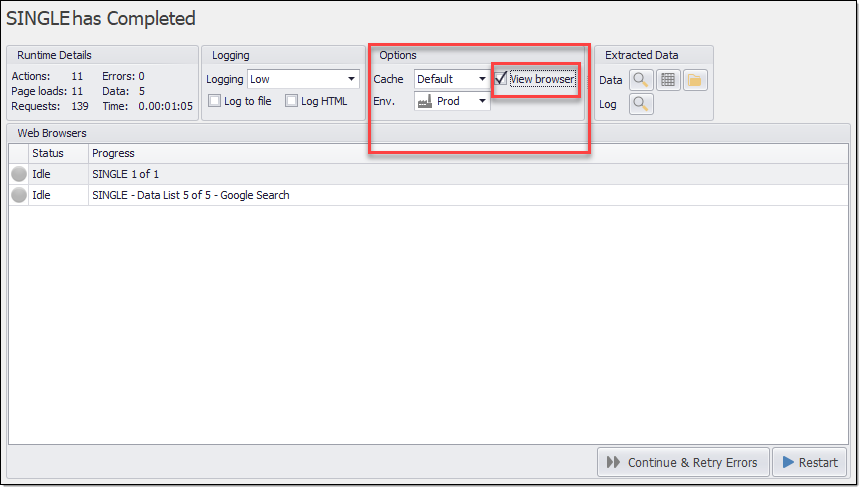
View Browser: The View Browser feature is available in the Run Action Command. In order to use this feature, you can enable the View Browser checkbox. This feature enables you to see the dynamic web pages during the execution of an agent which can help you to debug issues where the agent is throwing an error. View Browser can only be used when the agent or URL in the agent is configured in Dynamic Browser.
Sessions-Session: This feature is available in the Run Action Command. In order to use the feature, the agent should be configured in Multiple Session, Performance Session or Mixed Session. Sessions allow you to run multiple instances of the agent at the same time thus helping you to decrease the execution time of the agent. You can input the number of sessions you want to run your agent in the session input window.
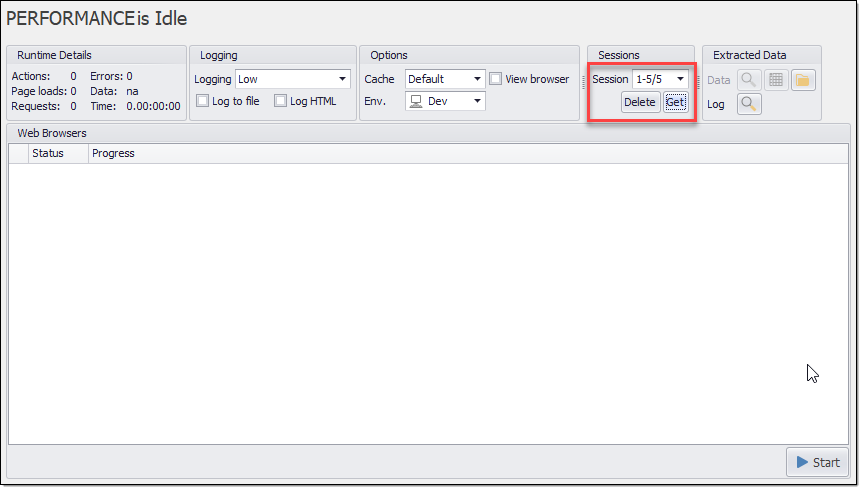
Sessions-Get: This feature is available in the Run Action Command and allows you to get the status of all the running and completed sessions of the agent. You can input the session in the session window and click the Get button available below to get details of a particular session or all the sessions at once. Once you click get, it opens another window which will show you the progress or status of the already completed or running sessions.
Session-Delete: This feature is available in the Run Action Command and allows you to delete the sessions that have been created previously. You can input the session in the session window and can click the delete button below to delete a particular session or all the sessions at once.
Extracted Data-Data: This feature is available in the Run Action Command and allows you to take a look at the data that has been crawled by the agent once the agent completes its execution.
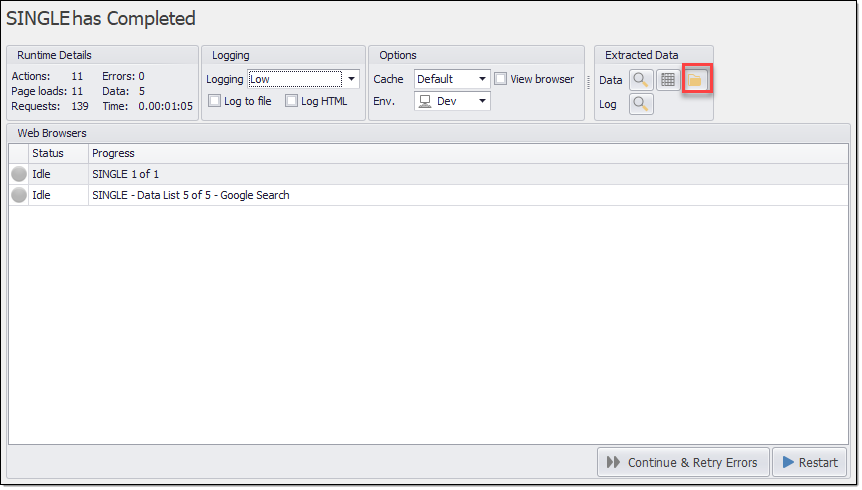
Extracted Data-Open Export Folder: This feature is available on the Run Action Command and allows you to open the folder where the extracted data has been saved in a specific format such as CSV, Excel, Parquet etc.
Extracted Data-Log: This feature is available in the Run Action Command and helps you to get more information about the errors or warnings the agent faces during its execution.
Data menu
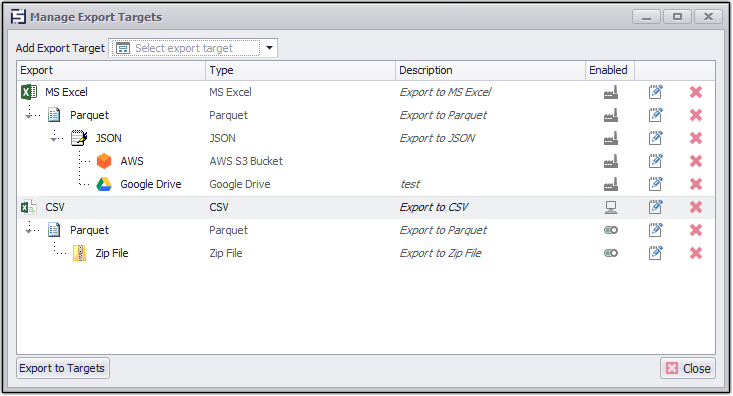
Export Targets Configuration: User can configure the agent's export target(s) by clicking the ribbon menu button Data > Export Target Configuration.
Additional export targets can be added to the export pipeline via the Add Export Target drop-down, or via mouse right-click context menu.
How to use Export script in new export targets:
In order to use the New Export Targets settings the agent should be configured in Non-Compatible mode. It can be set from the Agent Properties.
Using this feature, to Deliver Data through the export script you have to add a pipeline in the Export Target setting with the existing delivery formats like CSV or Parquet and can use a generic script for export target in the export script.
First, select the format you want to export your agent in and then add Export Script as its child node.
Similarly, if you want to export in both CSV and Parquet, Add the Export Target as CSV, then in the pipeline add Parquet Export and then the child node as Export Script.
Regenerate Export Data: Regenerate Export Data allows the user to regenerate the data from the database if the agent fails to export the data after the run completes.

View Export Data: Views the data extracted by the agent. You must run the agent before you can view the Extracted data.

Open Export Folder: Opens the File folder where extracted data is saved.
If the agent is downloading files you’ll need to look directly in this folder to view the downloaded files.

Open Exported Spreadsheet: Opens the exported spreadsheet or CSV file. Please remember to close the spreadsheet before running the agent again, as the Sequentum Enterprise can’t export to a file that is open.

Internal Data: Sequentum Enterprise stores internal data in the database - which contains all the data extraction elements for any agent, but also contains the data which corresponds to the settings for the agent properties.
You can always view the internal data by clicking the Data > View Internal Data menu.

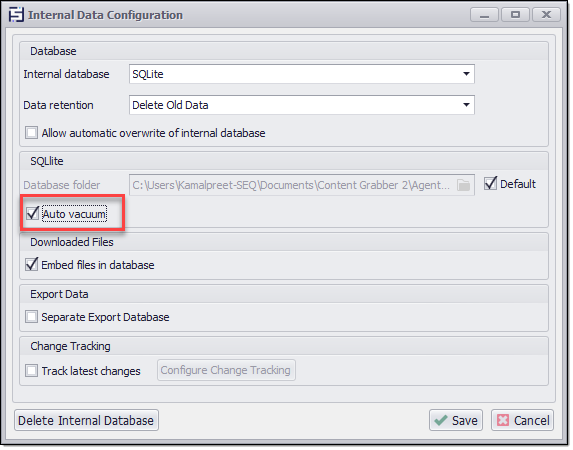
Internal Database Settings: The default internal database is an SQLite database, but this can be changed to SQL Server or MySQL. Oracle and OleDB are not currently supported as internal databases.

Auto Vacuum: This feature automatically decreases the size of the SQLite Database when data is deleted. You must delete the existing internal database before these changes take effect. In order to enable this feature, click the Internal Database under the Data tab in the Menu bar. A prompt box will open which will allow you to make the changes i.e. check or un-check the Auto Vacuum box.
Validation Rules: Data Validation ensures that the data captured has undergone quality control so the data is both correct and useful. Sequentum Enterprise makes data validation simple and easy through a centralized screen where every field can be configured to ensure quality.
Under the Data tab click on Validation Rules to navigate to Data Validation Screen.

For more information, please read the article Data Validation Screen.
Success Criteria: A success criterion can be defined to tell an agent when it should consider an agent run successfully. For example, success criteria could include that the agent must load a minimum number of pages.
The Success Criteria window can be opened from the Data menu in the Sequentum Enterprise editor.
The following four success criteria can be defined.
Min. Page Loads: The minimum number of pages the agent must load.
Min. data count: The minimum number of data entries the agent must extract. Data entry is defined by setting the option to Increase data count on any command. The data count is increased every time command with Increase data count is executed.
Min. export rows: It defines the minimum number of rows exported to a file. A minimum number should be specified here so that it can prevent exporting blank files.
Max. page errors: The maximum number of page errors allowed.
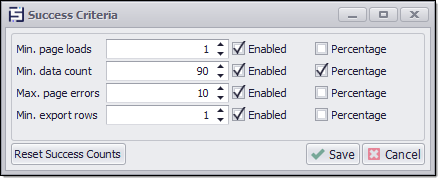
Success criteria can be specified as absolute numbers or as a percentage of the value from the last successful agent run. For example, if Min. data count is set to 80% it means the agent must extract a minimum 80% of the data count the last successful run. A Percentage criterion always succeeds if the agent has not been successfully run before.
Agent Settings menu
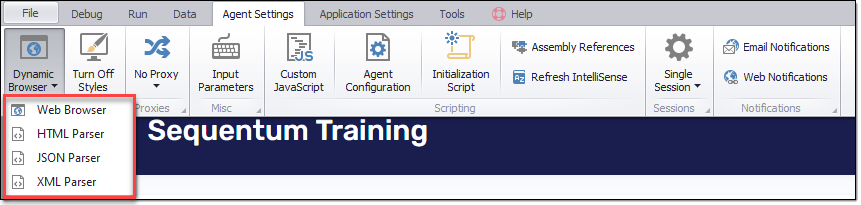
Browser-web: In Sequentum Enterprise, we can develop an agent in different browser modes like Web-Browser, Json, Html and Xml. This is the first command under the Agent Settings tab. It allows the user to set the default browser mode of the agent. Depending on the requirement, parser mode can be changed by clicking this command, a list of different browser modes opens so that one can select the browser mode.
Dynamic Browser/Web-Browser: When Sequentum Enterprise extracts data from a web page, it first loads the web page into a web browser. The web browser parses and renders the page, and executes JavaScript that page contains. This makes the execution time of agents made in dynamic browsers slow compared to other parsers.
Html Parser: The Html parser does not use a web browser and ignores JavaScript completely this allows you to execute your agent much faster than a web browser.
Json Parser: The Json parser executes the agent much faster as it only contains the text. This can be used by monitoring the required URL and finding the right HTTP API that allows you to fetch the data in Json.
Xml Parser: The Xml parser also does not use a web browser and ignores javascript. It is used only to parse the Xml content on a web page which again allows the agent to execute faster.
Turn Off Styles: Turn off Styles allows the user to turn off all the CSS styles that are used on the web page to make the web page load faster.
You may need to reopen the same agent again when you click Turn Off Styles. This feature is available under the Agent Settings tab.

Application Proxy: The agent uses the default proxy settings configured in the Application Settings Menu.
Once you purchase proxy server access or found free proxy servers on the web, you will receive one or more proxy server IP addresses and possibly a username and password to access the proxies. You need to enter this information into the Sequentum Enterprise agent by selecting Agent Settings from the ribbon menu, or you can set up default proxies in the Application Settings ribbon menu.
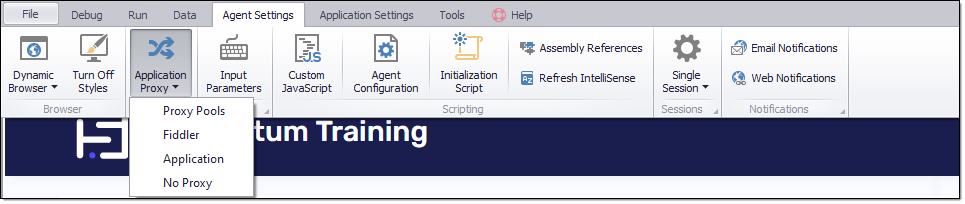
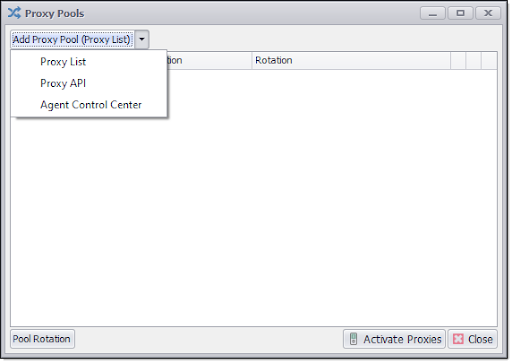
proxy pools : Sequentum Enterprise can integrate with the following 3rd party proxies:
Proxy List: The agent uses a specific list of proxies. To add proxies to the list, Click on the Add Proxy Pool (Proxy List)option under Agent Settings-→Proxy Pools→Proxy Pool Settings.
Proxy API: If you set the Proxy pool to Proxy API, you can specify API configuration to download a list of proxies from a 3rd party API.
Agent Control Center – Generally, we use the Agent Control Center which has a large number of servers running in a cloud infrastructure from where we fetch the proxies configured on it i.e. your third party proxy services can be configured on Agent Control Center.
Fiddler: You can also set a proxy to Fiddler, which will allow you to view web traffic between Sequentum Enterprise and the target web server. This requires Fiddler Software running on your system.
Application: The agent will use the default proxy settings configured in the Application Settings menu.
No proxy: The agent doesn’t use any proxies.
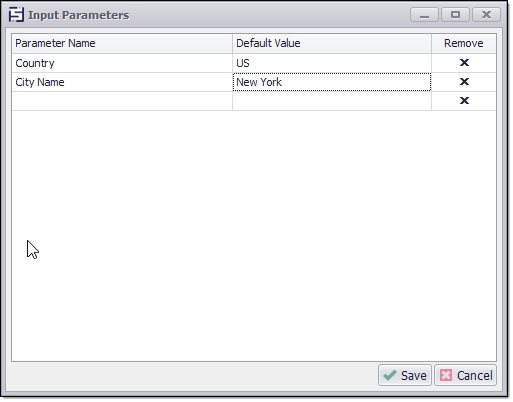
Input Parameters: Input parameters are named values that get their value assignments when an agent starts. You can specify these as command-line parameters when an agent is running from the command line, or specify them in a GUI window when running the agent from the Windows desktop. Any data consumer command within the agent can use these parameters. You can find this command under the Agent Settings tab in the Menu bar.

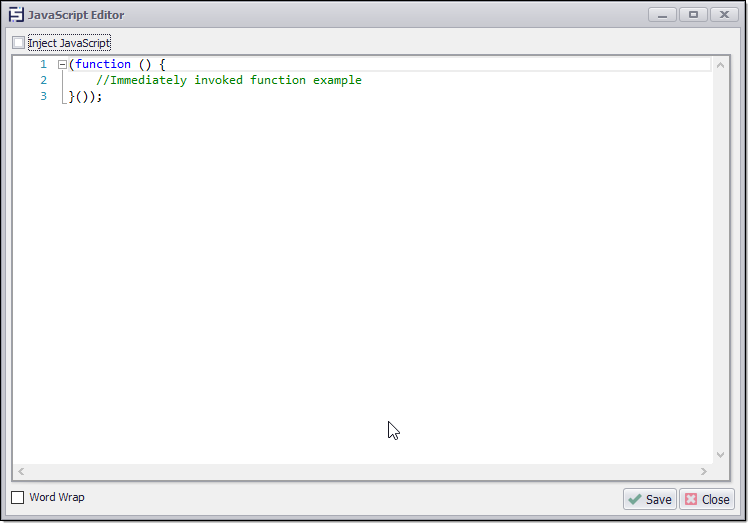
Custom JavaScript: The Custom JavaScript will be injected into all pages loaded by a Dynamic Browser.

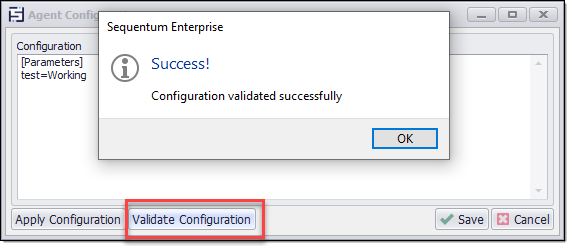
Agent Configuration: Agent Configuration is used to define and enforce specific Configuration for an agent. You can access the Agent Configuration option under the Agent Settings menu to write and manage agent configuration.

Click Validate Configuration once you add configuration Parameters, then click Apply Configuration to apply configuration for that agent.
Initialization Script: Initialization Script is executed before the agent starts. This script allows you to set certain agent parameters like database connection strings or start URLs.

Note: Initialization Script can be c# scripting or VB.Net, Python or it can be disabled as well depending on the requirement.
Assembly References: A list of .net assemblies used for Scripting. These can be standard .net assemblies or custom assemblies.

You can use external assemblies in your scripts by adding Assembly References to your agent.
Refresh IntelliSense: This feature refreshes Intellisense in all script editors. Use this button to Refresh IntelliSense after adding or removing Assembly References.

Sessions: Sessions allow you to run multiple instances of the same agent at the same time. This is particularly useful when running an agent directly from a website where you can have many web users visiting the website at the same time.
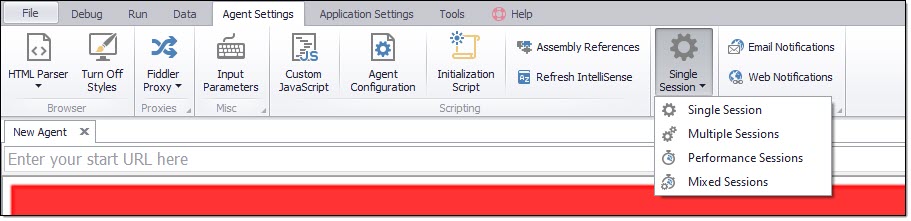
Sequentum Enterprise supports the agents Run in Single Session, Multiple Sessions, Performance Sessions and Mixed Sessions.
Single Session: This feature is available under the Agent Settings tab. This allows the user to run the agent in a single instance or a single session.
Multiple Session: This Feature is available under the Agent Settings tab. In order to enable this feature click single session option which opens a drop-down menu, then select multiple Sessions. Multiple Sessions allow you to run multiple instances of the same agent parallelly where all instances have the same inputs. In multiple sessions, the number of files created is equal to the number of instances that are running.
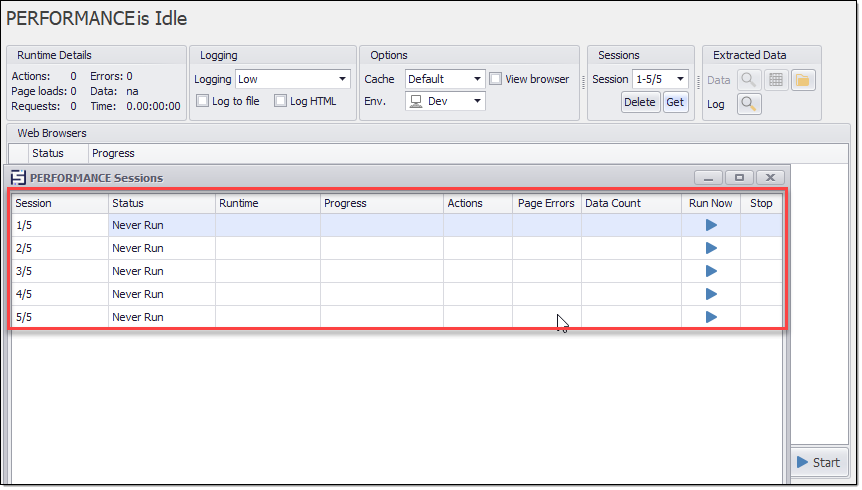
Performance Session: This Feature is available under the Agent Settings tab. In order to enable this feature click single session option which opens a drop-down menu, then select Performance Sessions. Performance Sessions allows you to run multiple instances of the same agent with different inputs where the inputs are divided on the basis of the number of Instances. Performance session generates only a single file and the file is generated once all the instances complete their execution.
Mixed Session: This Feature is available under the Agent Settings tab. In order to enable this feature click single session option which open a drop-down menu, then select Mixed Sessions. As the name suggests Mixed Sessions is the combination of both Multiple Sessions and Performance Sessions.
Note: In order to enable Multiple Sessions, Performance Sessions and Mixed Sessions. You need to set the Process in Sessions to True in the List Elements properties.
Email Notifications: This feature Opens the Notification window where you can enable and configure Email Notifications.
Email Notifications can be sent when an agent completes its run and certain conditions are met.

Web Notifications: This feature opens the notification window, allowing you to enable and configure web notifications.
Web Notifications can be sent when an agent run starts, completes, or both, depending on the user's preferences and requirements.

Generate Browser Cache
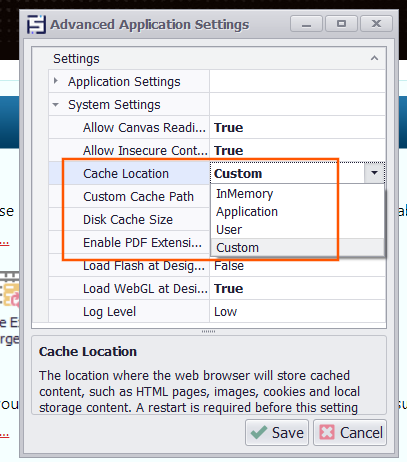
The Generate Browser Cache feature allows users to create browser cache during debugging at the path defined in the Advanced Application Settings → System settings . This functionality is accessible via the new Generate Browser Cache button located under the Agent Settings menu.

Steps to use the feature :-
Open any agent in SE.
Configure the cache location (Custom, Application or Users) in Application setting.
Now start the debugging of the agent.
When the debug is successfully completed, navigate to Agent setting and click on Generate Browser Cache. It will generate the debug cache in the configured location. The cache can be further used in subsequent Debugs or Run of the agent.
Application Settings menu
Application Proxy Pool: Application Proxy Pool is the first feature available under the Application Settings tab in the Menu bar. This feature allows you to set proxies to agents. click on Application Proxy Pool, a GUI window opens that allows you to choose different options that are provided i.e. Proxy List, Proxy API and Agent Control Centre from a drop-down menu to set proxy pools for your agent.

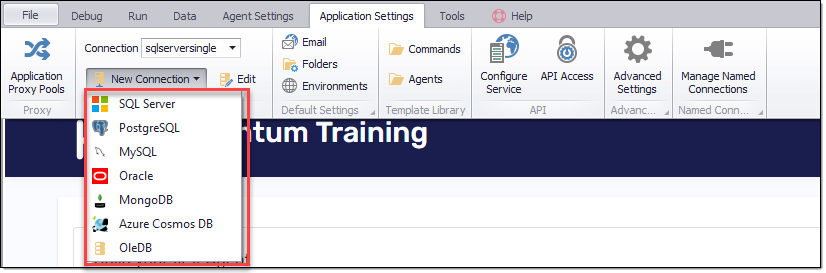
Database Connection or New Connection: This feature is available under the Application Settings tab and helps you connect the agent to a database where one can store the data that is crawled.
Click New Connection, a drop-down menu opens where you can choose your preferred Database. A new prompt box opens once you click the database that allows you to create a new connection by adding your database credentials.
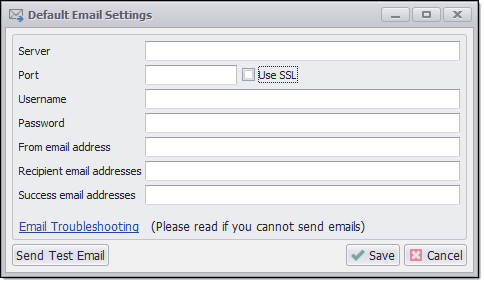
Email: Email is available under the Application Settings tab and this feature allows you to deliver the crawled data through Email. In order to set up the Email settings click Email, a prompt box opens that allows you to add the server, port, username, password, from address and recipient address. Once you configure these settings you are all set.

Folders:

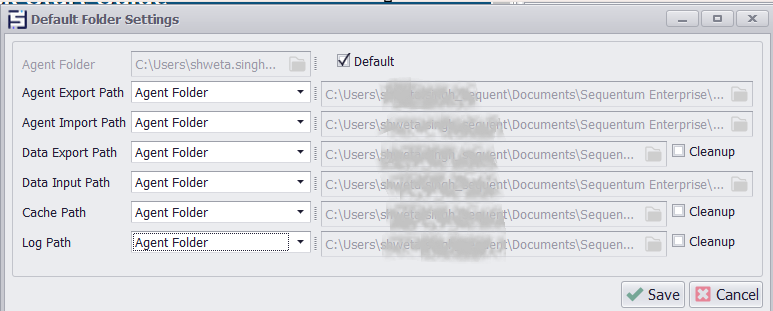
Default folder option
To use the centralized folder, please refer to the Centralized Folders.
Advanced Settings: Advanced Settings is available under the Application Settings tab and this feature allows you to make changes to the system settings as well as the Applications settings of the agent.

Template Library Settings
Advanced Settings → Advanced Application Settings → Template Library Settings → The Template Library Settings in Sequentum Enterprise provide options for managing script encryption and sharing between agents.
Default Value for Encrypt Option: Sequentum Enterprise includes an Encrypt option for the Template Library, allowing you to encrypt the template script. The default value is set to False. This option can be enabled or disabled at the application level and has two settings:
True: Encrypt option will be enabled.
False: Default value is False, which is used to disable the Encrypt option.
Default Value for Shared Option: Sequentum Enterprise includes a Shared option that allows you to easily share scripts between agents.The default value is set to False. This option can be enabled or disabled at the application level and has two settings:
True: Shared option will be Enabled.
False: Default value is False, which is used to disable the Shared option.
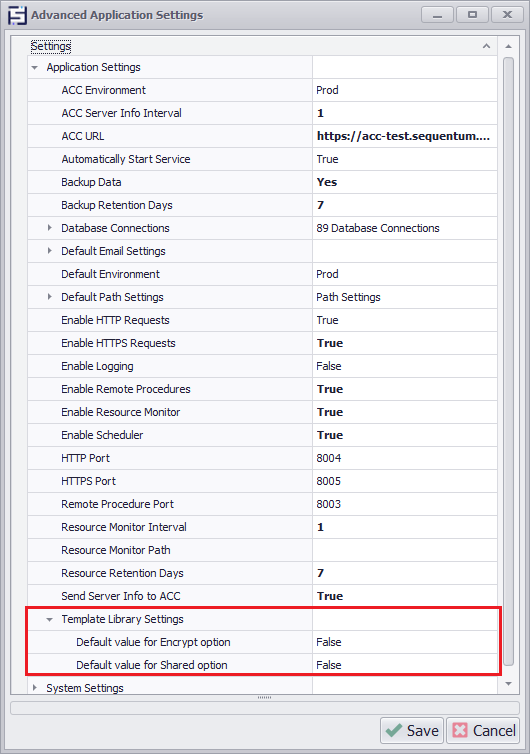
Advanced Application Settings → Template Library Settings
Disk Cache Size
Under Application Setting > Advanced Settings > System Settings, we have a property Disk Cache Size (default value = 50 mb) which tells the amount of disk space a browser uses for its cache per single session.--

Backup Data
Available under advanced application settings, it creates a backup of all exported files into a specified folder at the application level. To use the centralized folder, please refer to the Centralized Folders.
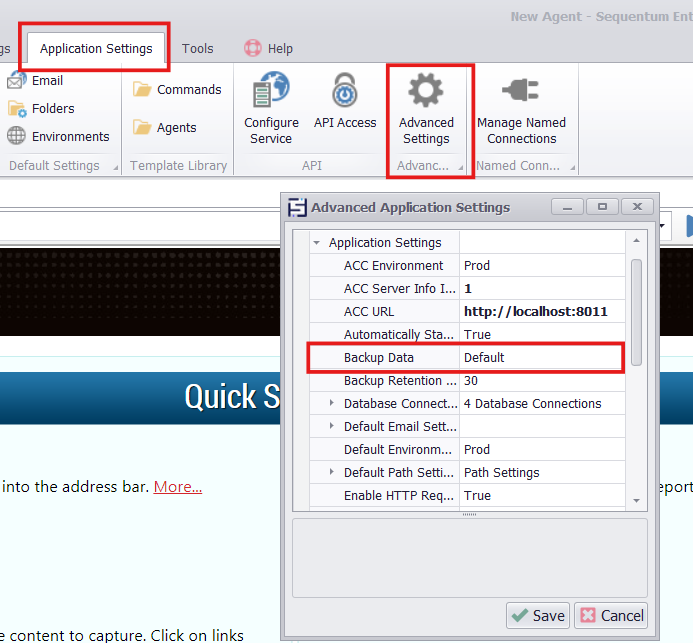
Backup data setting in the application settings
Tools menu
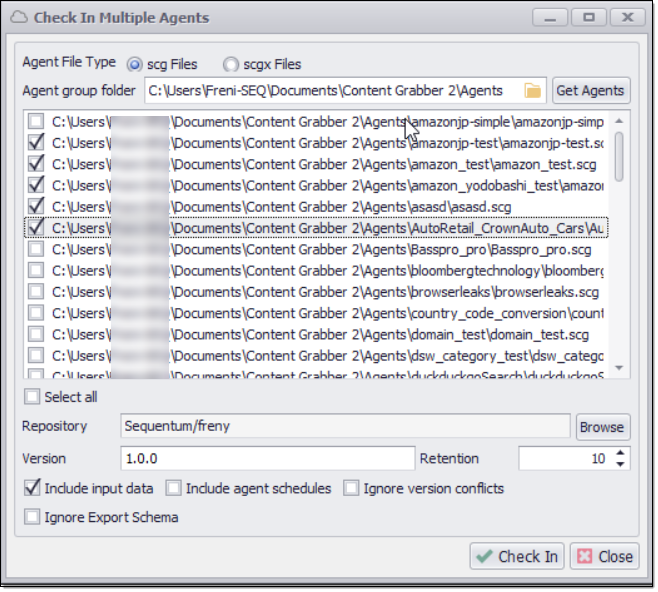
Check-In Agents: You can check-In multiple agents at the same time in the agent repository using this feature available in Tools menu options. First, you need to login to http://acc-test.sequentum.com/ . Then navigate to Tools and click Check-In Agents. A prompt box appears where you can select multiple agents that you want to check-in you can also input the version number, select the location in the repository. Click Check-In and your agents will be checked in to the repository.

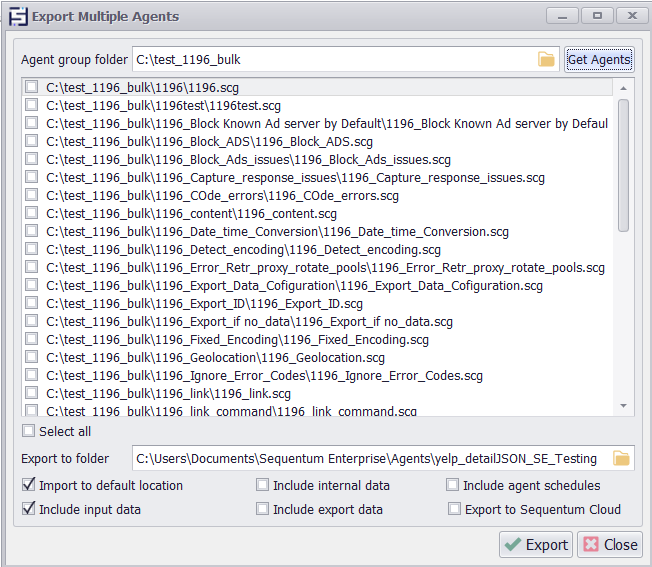
Export Agents: This feature allows you to export your agents. Navigate to Tools click Export Agents. A window opens which asks for the number of agents to be exported. Select the agents that you want to export, location and click export.

Manage Agents: This feature is available in the Tools Menu Bar. Manage Agents allows you to check the status of all the agents available on a particular machine for ex. if the agent is Incomplete, Complete, Export Failed or Never Run. You can also check the last Run Time and can Start and Stop the agent's executions and can set the schedule of the agent.

It shows the details regarding the Last Run, completed, Status, Next Run and Log.
Continue and Retry
It allows users to continue and retry execution of Single or multiple agents as per the requirement by selecting the agent/agents, which is useful when some agent/agents has/have failed, remained incomplete or has/have been stopped intentionally during previous runs. This option eliminates the need for manual retries and allows the rerunning of the single or multiple agents interrupted by any issue.
How to Use:
Navigate to Tools → Manage Agents.
Click on the Continue and Retry Errors Button

Select the agent/agents that need to be retried.
Click on the Continue and Retry button.
The selected agents will be processed for retry automatically without needing to open each one individually.

Restart Agents
This property allows you to restart multiple agents simultaneously that failed to complete due to unexpected issues or any errors.
How to Use:
Go to Tools → Manage Agents.
Click on the Restart Agents button.

Select one or more agents that need to be restarted.
Click on the Restart option.

Any agent/agents selected for restarting should restart successfully, and their status should reflect "Running" after the restart when we click on the Refresh Data button in the Manage Agent window.

NOTE:At present, this feature functions effectively with an agent set up in a single session. However, for agents configured in multiple sessions or performance sessions, if the user wishes to execute them on a session-by-session basis, it is recommended to use the run agent window exclusively.
Web Request Editor: This feature is available under the Tools tab. This allows you to view or check the request URL of a web page that is open in the Agent.

View Html in Text Editor: This feature is available under the Tools tab. View Html in Text Editor allows the user to view the Html content of a web page that is open in the Sequentum Enterprise window.

View Website in External Browser: This feature is available under the Tools tab. As the name of the feature suggests it allows the user to view the website that is open in the Sequentum Enterprise window in an external browser.

Browser Tools: This feature is available under the Tools tab. This allows the user to monitor the web requests. It behaves the same as the Dev tools in the chrome browser.

Create Website Images: This feature is available under the Tools tab. Create Website Images allows the user to create multiple Images of different web pages that are present on different windows. This feature by default creates a separate folder in the agent folder named WebsiteVersions and creates a Time-Stamped folder in it which contains all the Images, PDF or Html Pages in it.

Create Screenshot Log: Create Screenshot Log commands can be used to generate a log file that consists of a sequence of text entries with associated screenshots. This can be used in agents designed to test procedures on a website, to also produce simple documentation for the procedure.

Clear Cookies & Storage: Clear Cookies & Storage is available under the Tools tab in the Menu bar. This allows the user to Clear all the sessions, local storage and delete all the cookies of the agent.

View Windows: This feature shows or hides windows that show additional information about selected web elements in the web browsers. For ex. this feature allows you to add or remove the Html, Tree View, Data, XPath tabs from the Right Bottom pane of the Sequentum Enterprise window. View Windows is present under the Tools tab in the Menu Bar.

Reset User Interface: This feature allows the user to reset the user interface of the agent i.e. resets the Sequentum Enterprise user interface to the original settings. It is available under the Tools tab in the Menu bar.

Encrypt String- This feature is available under the Tools tab. In order to open this feature click Misc, a drop-down opens which contains the Encrypt String. This allows you to encrypt any username, password or other parameters. You can copy the encrypted string and paste it into the Set Form Field command and enable Encrypt property as Simple in the set form field property.

