
Automating File Uploads to Web Sites
Automating file uploads to websites is often very difficult because of the security implications of uploading files from your computer. Websites use special form fields to provide file upload functionality, which allow a user to select a file on his computer and upload it to the website. All web browsers restrict any automation of the file upload form field, because of the risk of users unknowingly uploading files that contain sensitive information.
Sequentum Enterprise uses Chromium as web browser and is therefore limited by Chromium’s restrictions on file uploads. Sequentum Enterprise works around this problem by replacing file upload form fields with normal text input form fields that hold the file paths. Sequentum Enterprise then intercepts the form submit and adds the required headers and post data to the web request, so the file content is uploaded to the website. This works well for standard web forms, but more and more websites are using AJAX calls to upload files, because it gives a nicer user experience, and AJAX file upload is not supported by Sequentum Enterprise by default.
Websites that use AJAX calls to upload files are difficult to deal with, because they use JavaScript to retrieve the file path from file upload form fields, and then generate the web requests based on the content of the file upload form fields. Sequentum Enterprise cannot set the content of a file upload form field because of the security restrictions mentioned above, and trying to “hack” a website’s JavaScript to set the file path without using the file upload form field can be nearly impossible, especially if the JavaScript is minimized and therefore hard to read.
In this article I’ll show you how you can intercept AJAX calls to learn how a website uploads files, and then emulate these AJAX calls to upload files automatically with Sequentum Enterprise.
Uploading Files to Shopify
Shopify provides shopping cart functionality and allows its users to upload inventory as CSV files to their shops. The Shopify file upload uses AJAX to upload files asynchronously, so it’s not supported by Sequentum Enterprise by default. In this article, I’ll use Sequentum Enterprise to manually upload a CSV file and then examine the web requests in the Sequentum Enterprise Activity monitor to get the information needed to generate the web requests automatically.
First I’ll create a Sequentum Enterprise agent that logs into Shopify.
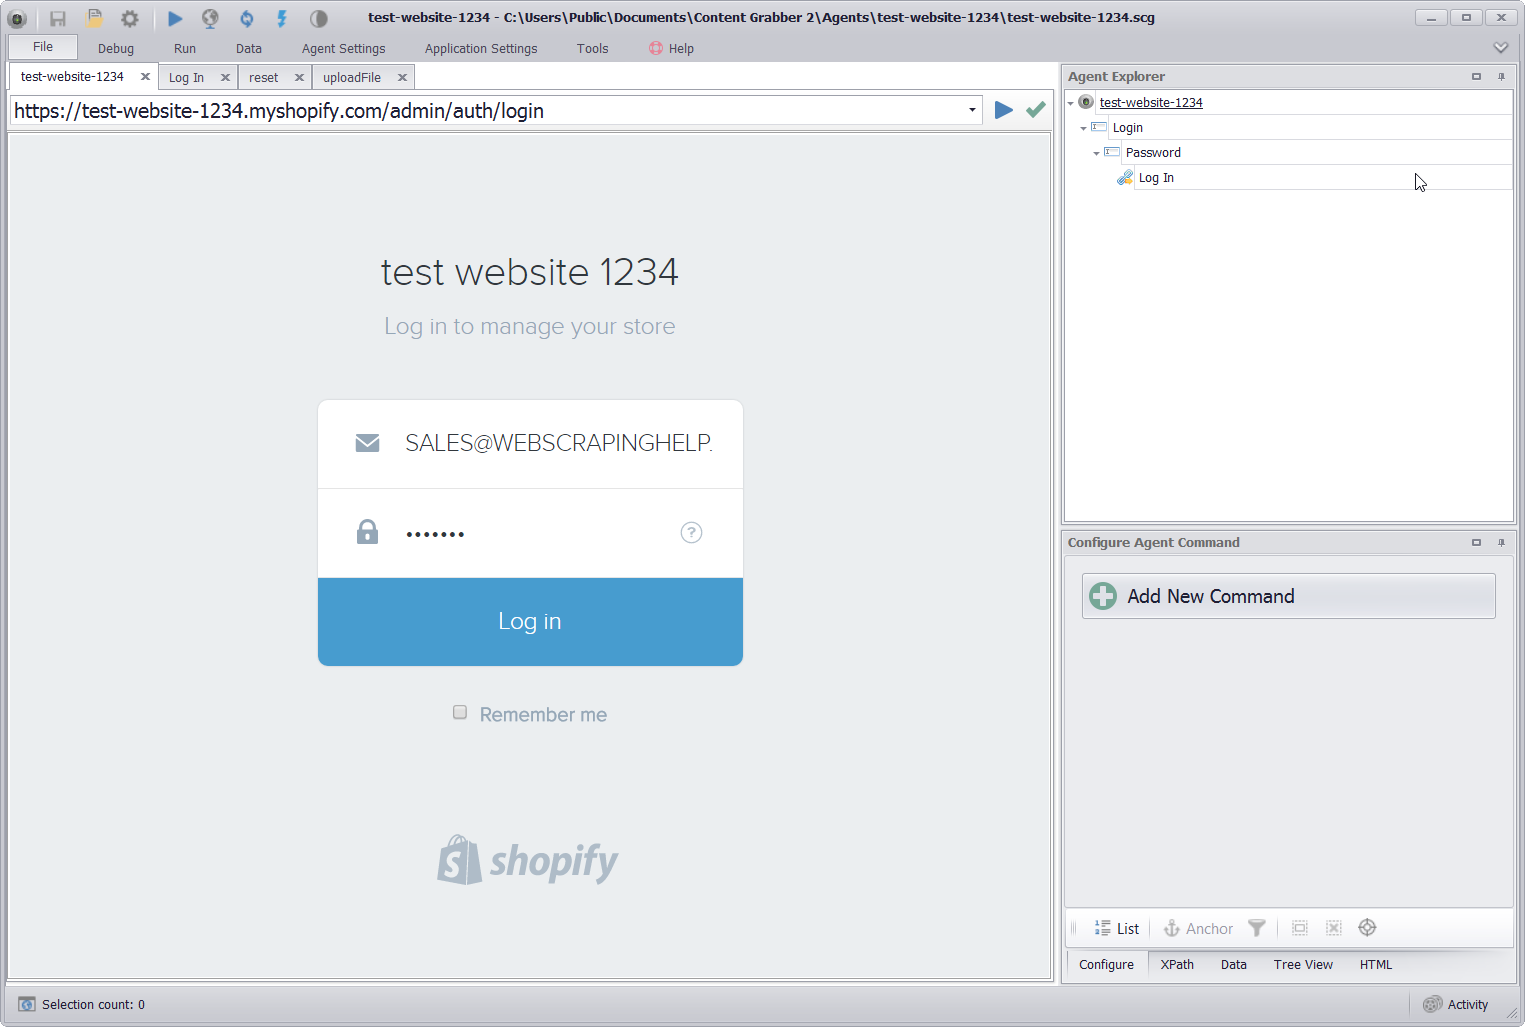
Shopify login screen
Now I’ll turn on navigation mode in Sequentum Enterprise, so I can manually upload a file.
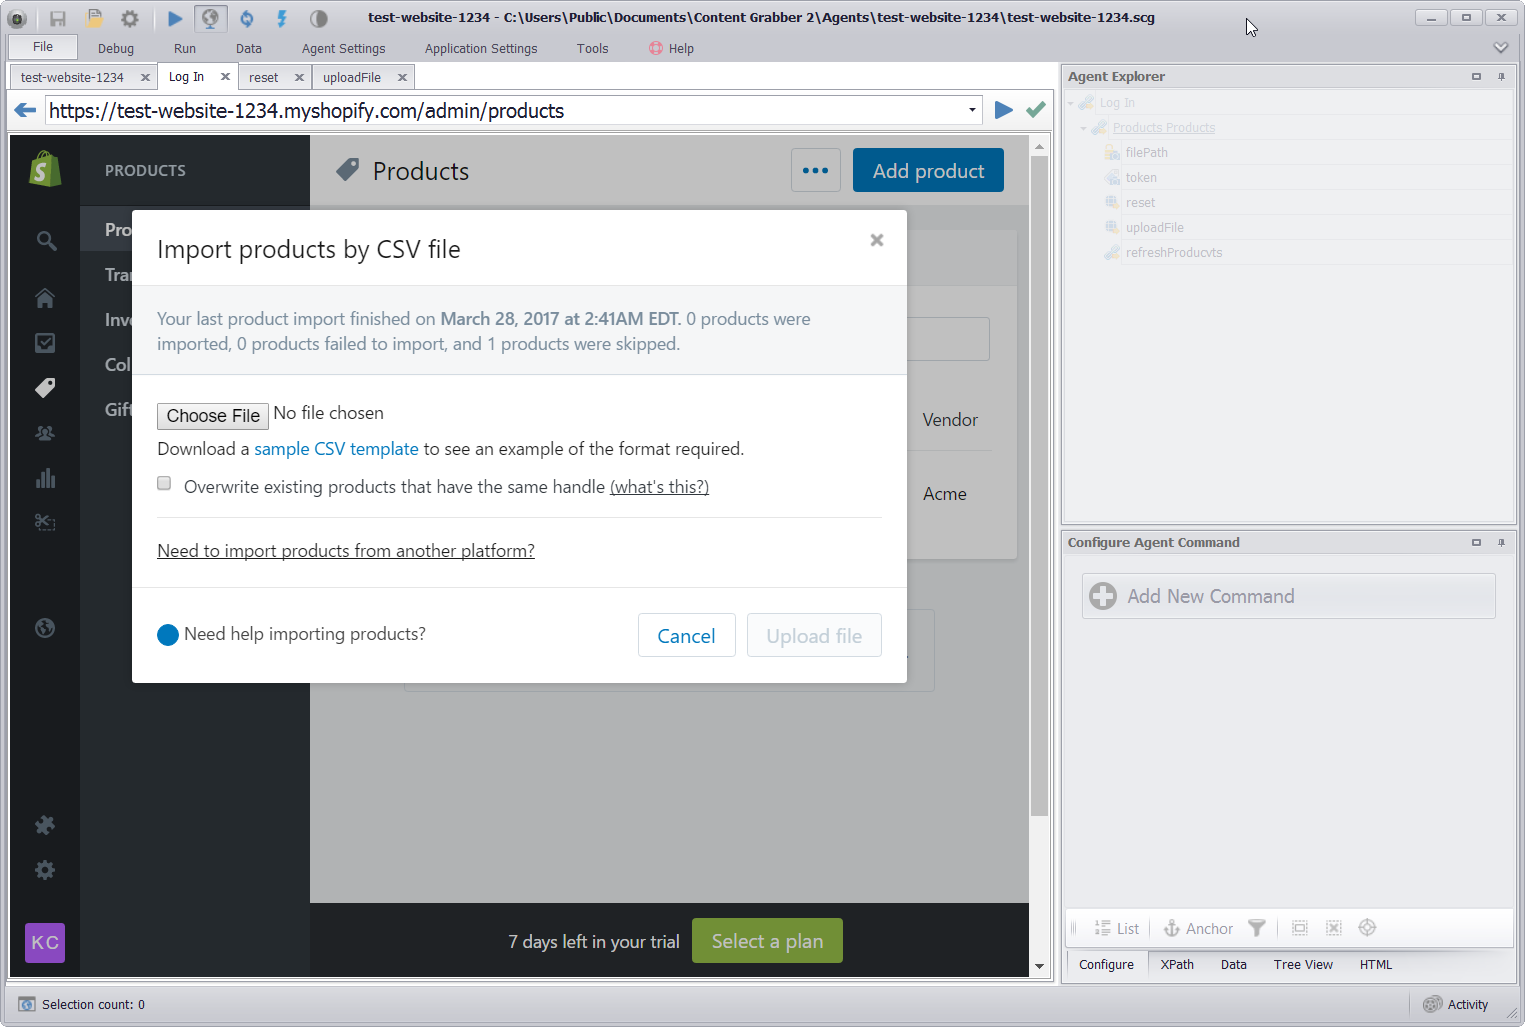
The Shopify file upload popup window
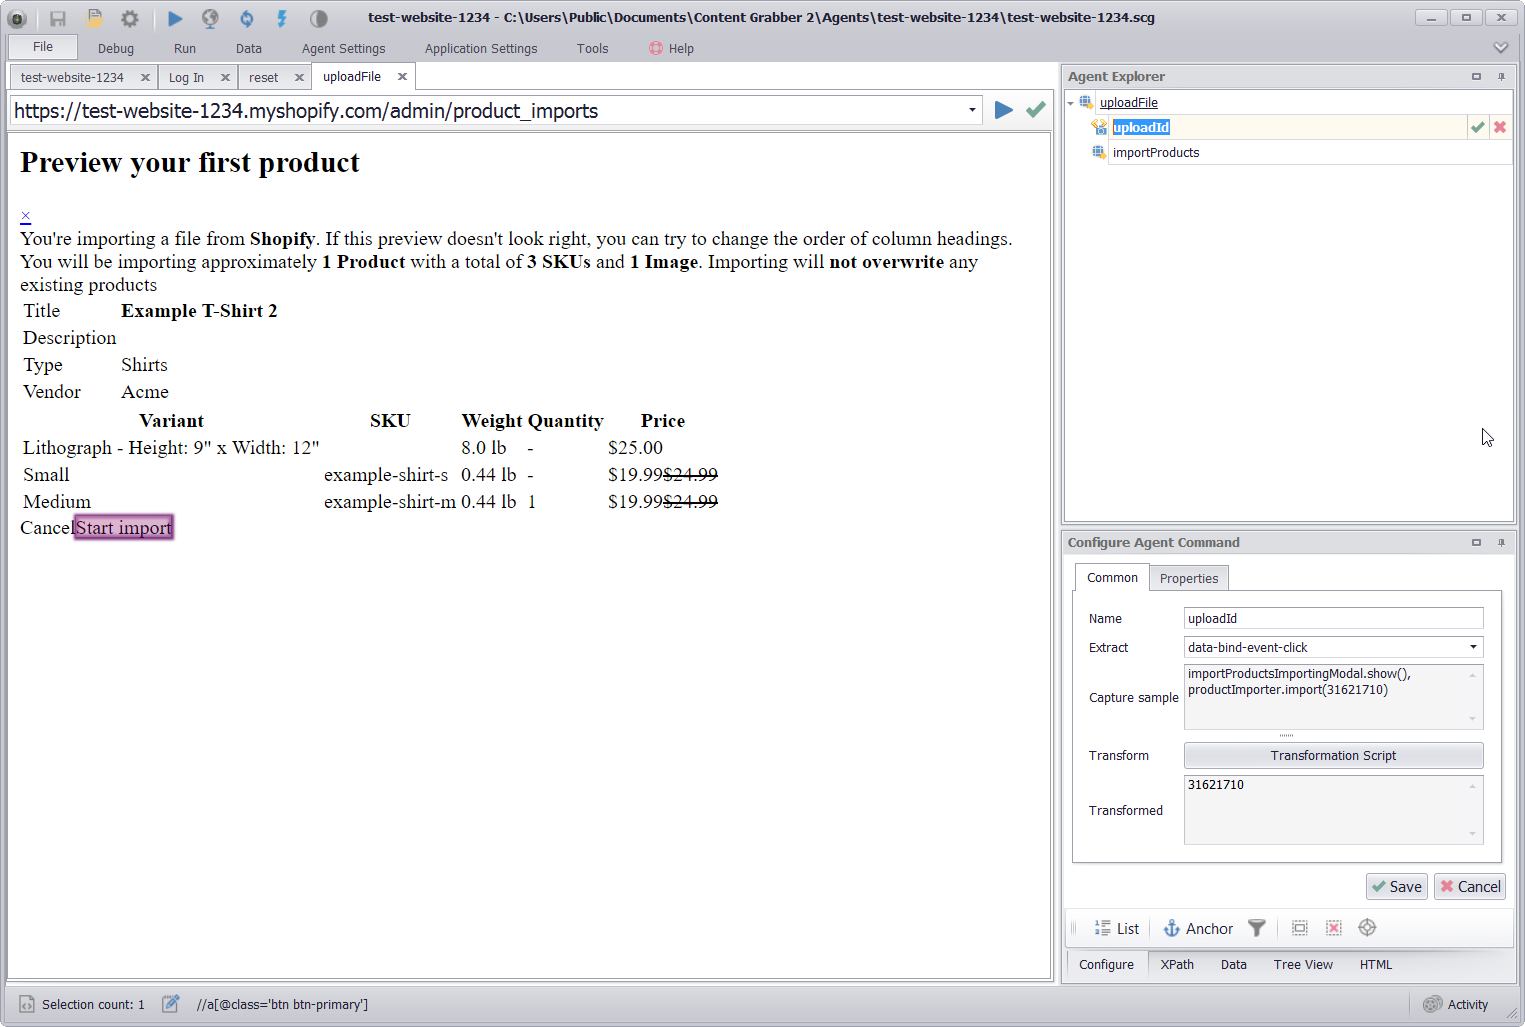
The file upload in Shopify is a two-step process. First I need to upload the file, and then I need to import the data in the uploaded file.
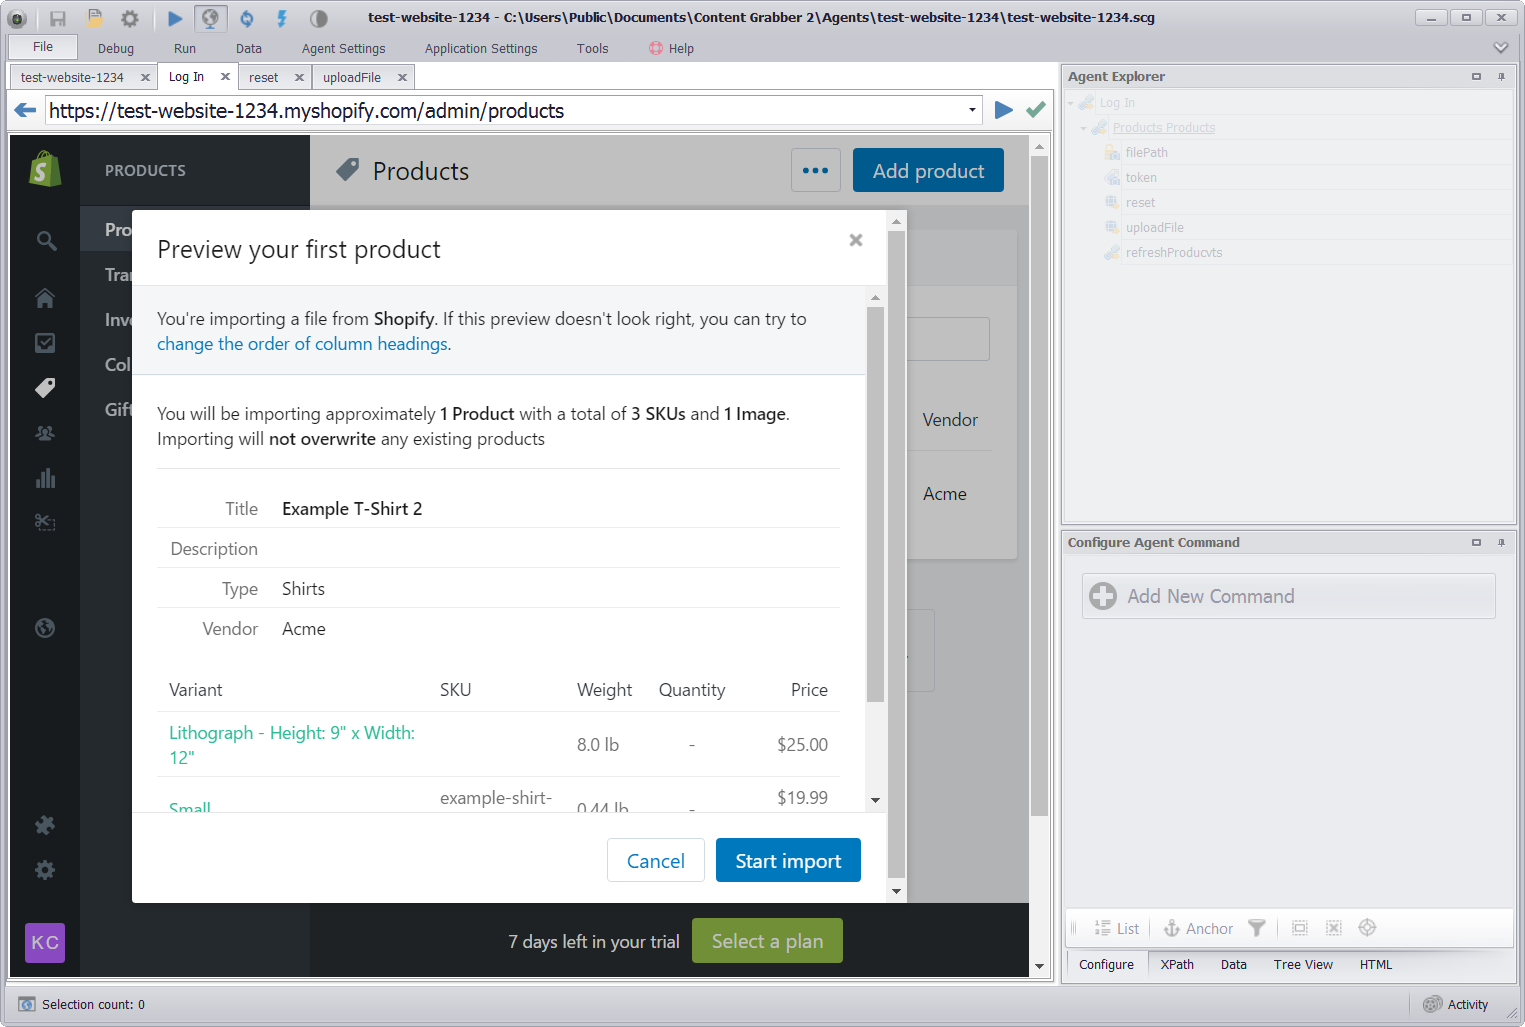
After uploading the file, I need to perform a second step to import the file content
I’ll now open the Activity Monitor and look for web requests that are relevant to the file upload.
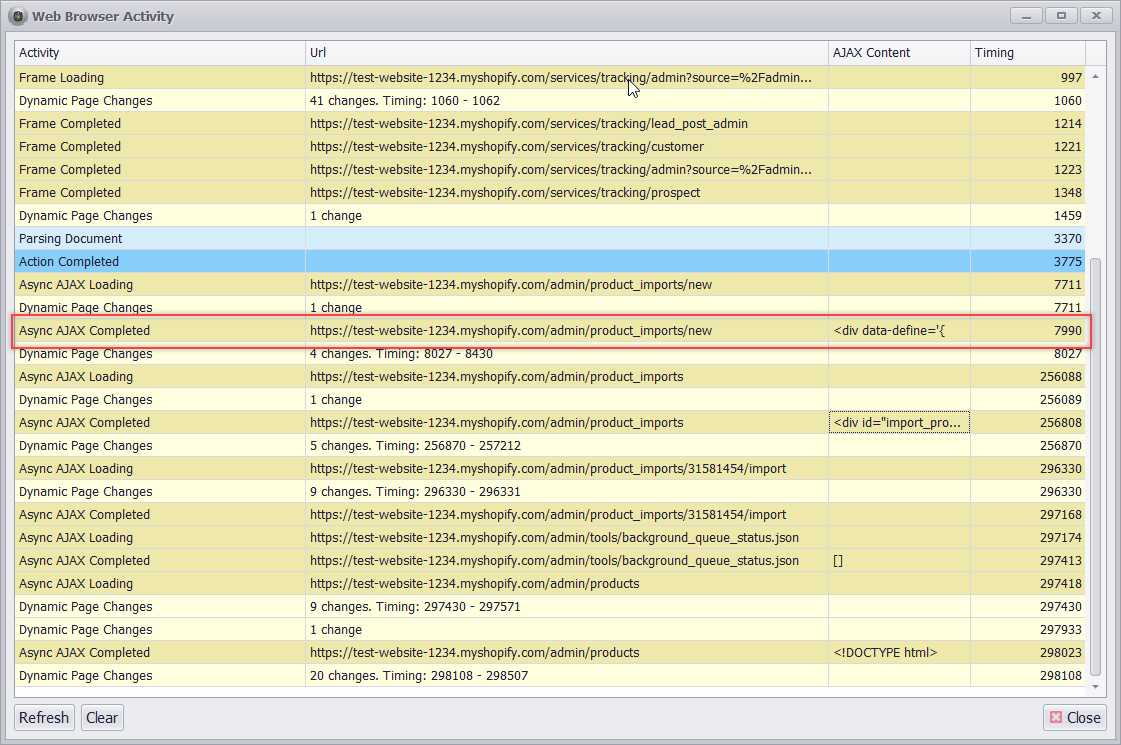
The Activity screen shows all important communication between the web browser and the web server
I’ve found the right web request, so I can open the Web Request editor to examine the request.
The web request that uploads the file to the web server
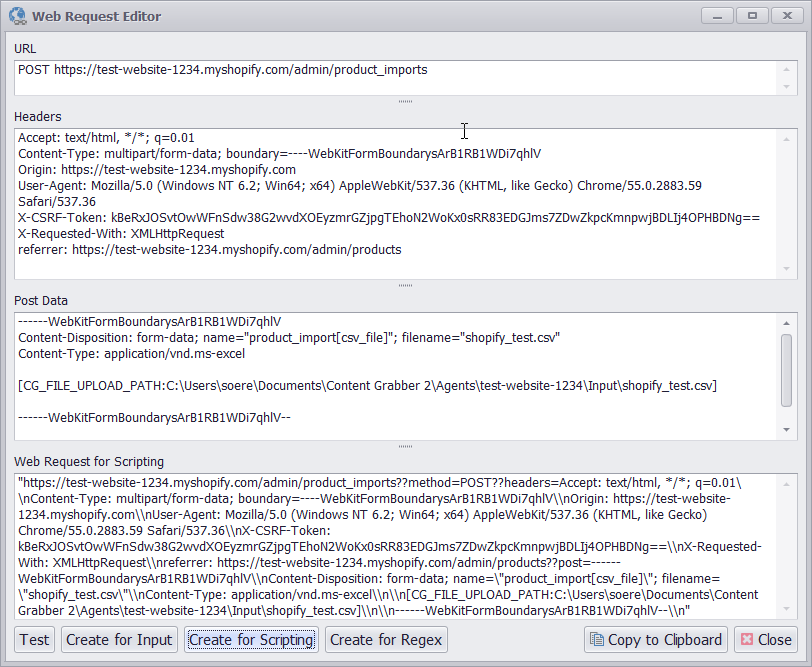
The web request contains two pieces of information that I need my agent to automatically insert into the request. Obviously, the most important information is the path to the file I want to upload. The second piece of information is something called a CSRF Token. CSRF Tokens are used on some websites as a security mechanism to make sure web requests originate from the correct client web browser. CSRF Tokens change every time you access the website, and if the agent didn’t set the current CSRF Token in the web request, the request would be rejected by the web server. On this website the CSRF Token is added to a web page as Meta data, so I can use a Page Attribute command to extract the CSRF Token.
I’ll use a Calculated Value command to specify a fixed path to the file I want to upload. I could very easily have used an input parameter or any other input data source to specify the file path, but I want to keep the agent simple for this example.
I now have two capture commands in my agent. One that captures the CSRF Token and one that captures the file path. I can use a Content Transformation script to easily insert the extracted data from these commands into my web request. I just need to replace the actual CSRF Token and actual file path in my web request with the name of the commands extracting that data. The command extracting the CSRF Token is named token and the command extracting the file path is named filePath, so I use {$token} in my web request to specify the CSRF Token, and {$filePath} to specify the file path.
My web request now looks like this.
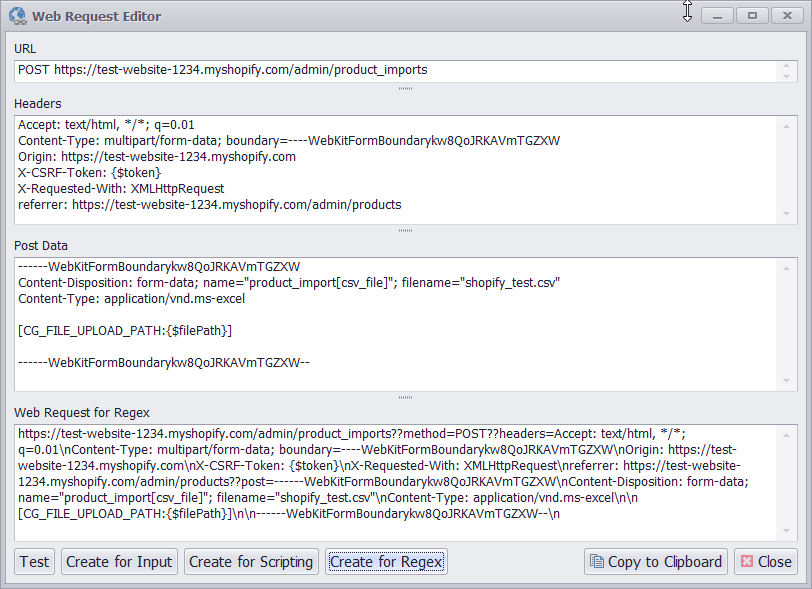
I’ve inserted data templates into the web request, which will be replaced at runtime with extracted data
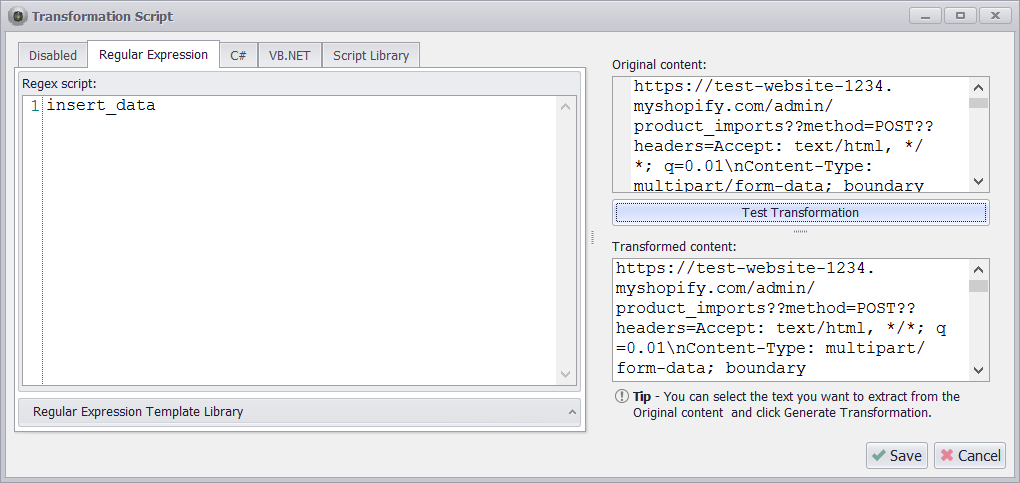
I’ll use a Navigate URL command to execute the web request, and add a very simple Content Transformation Regex script that uses the function insert data to replace {$token} and {$filePath} with the extracted data from the corresponding capture commands.
The CSRF Token changes every time you access the website, but at design time, Sequentum Enterprise will only extract data when you edit and save a capture command, so the extracted token used at design time will quickly become out-of-date. I’ll set the option Always Update Design Value on the token command, so that Sequentum Enterprise will update the design time value for the token command every time a new web page is loaded. This option is only relevant at design time. At runtime or when debugging, capture commands always extract data.
I’ll configure the Navigate URL command that executes the web request to use a HTML parser rather than a full dynamic browser. Dynamic browsers are slower and are not needed in this case.
Now that I have my web request sorted out, I’ll execute the Navigate URL command to upload the file.
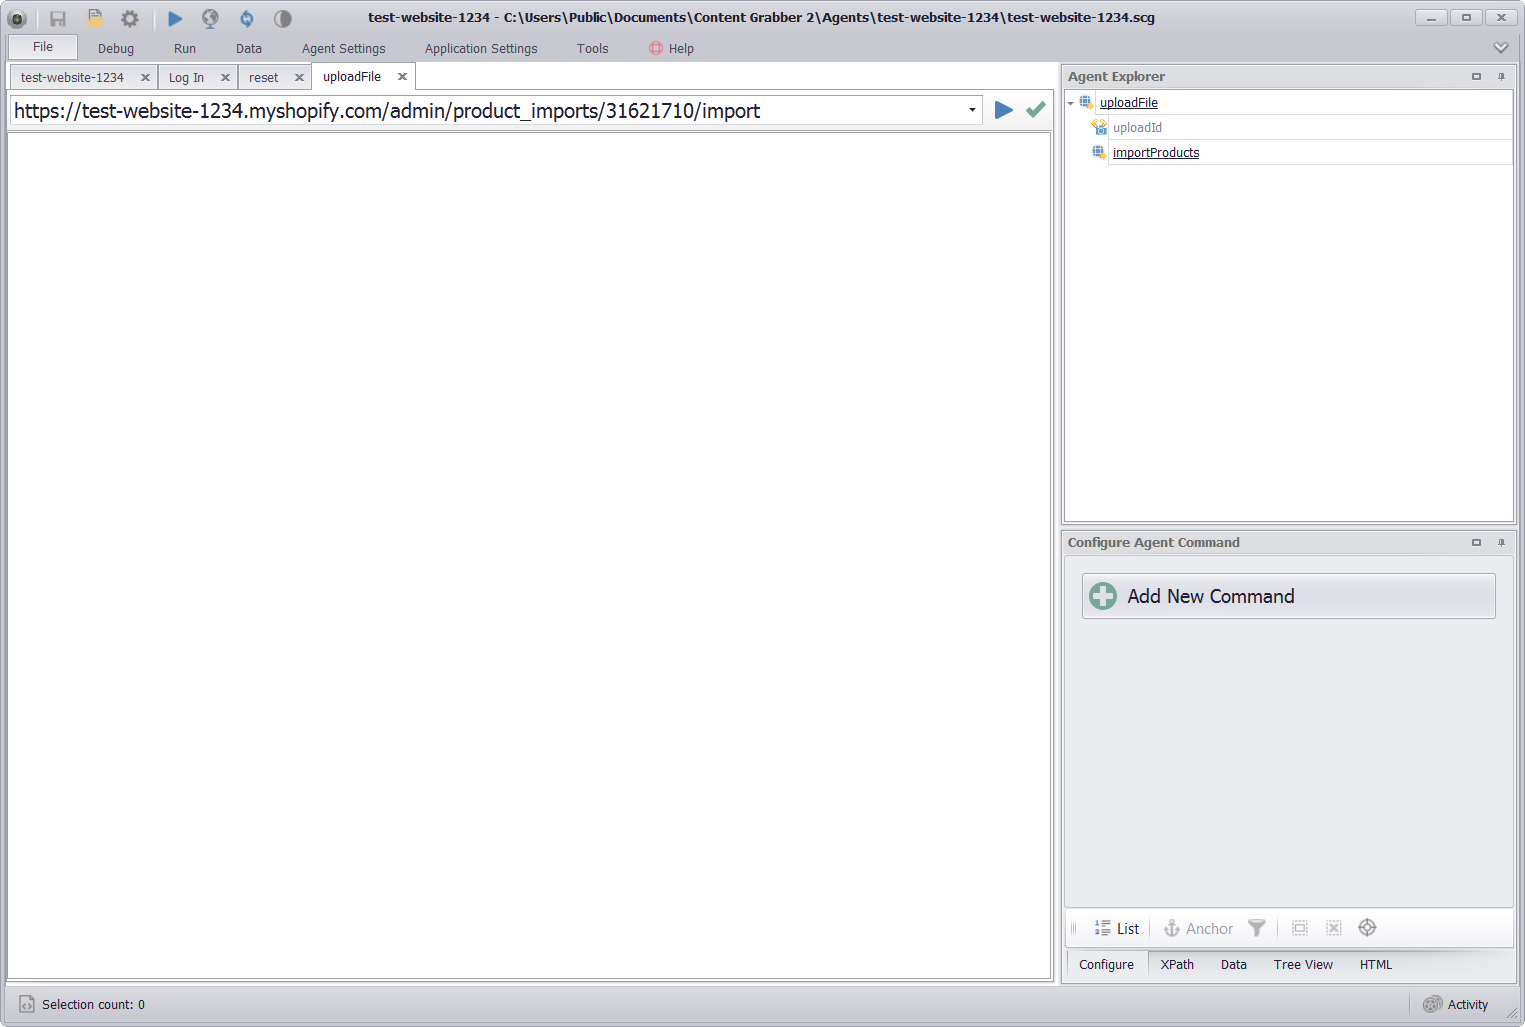
I now need to execute another web request to import the data from the uploaded file. Again, I’ll look through the Activity Monitor to find the web request that imports the data.
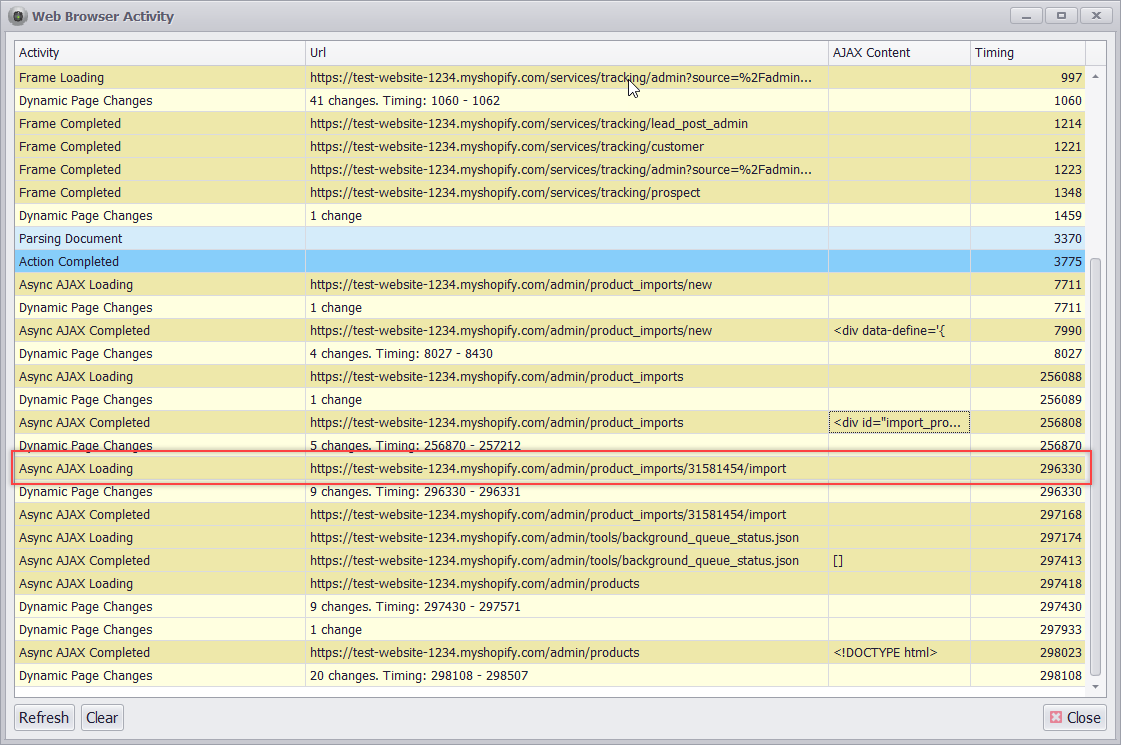
I’ve located then web request that triggers the import of data from the uploaded file
The web request importing the data is very simple. It requires the same CSRF token as before and an upload ID that is provided by the response I got when I uploaded the file.
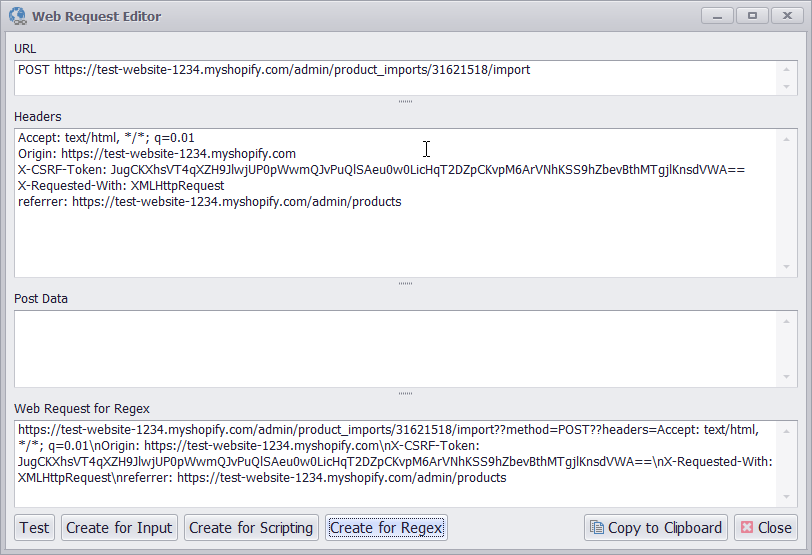
Details of the web request that triggers the import of data from the uploaded file
I’ll add a capture command to my agent that extracts the file upload ID from the HTML returned by the file upload command. I need a simple Content Transformation script to get the ID from the HTML. I’ll also use the Always Update Design Value option because the upload ID will obviously change every time I upload a file.
I need to extract the upload ID from the web page returned when uploading the file
I’ll use a Navigate URL command to execute the web request, and a Content Transformation script to insert the CSRF token and file upload ID into the web request.
A simple regex script is used to replace data templates with extracted data at runtime
The URL command I use to execute the web request will also use a HTML parser instead of a full dynamic browser. The web server returns nothing if the import is successful, so there’s no reason to use a dynamic browser for this. After executing the Navigate URL command I get an empty page which is what I want, because that means the import was successful.
After importing the data, the response from the web server is blank which means there’s no error
I’m now done uploading the file and importing the products. I’ve added a command to my agent that refreshes the product list, just to verify that the products have actually been imported.
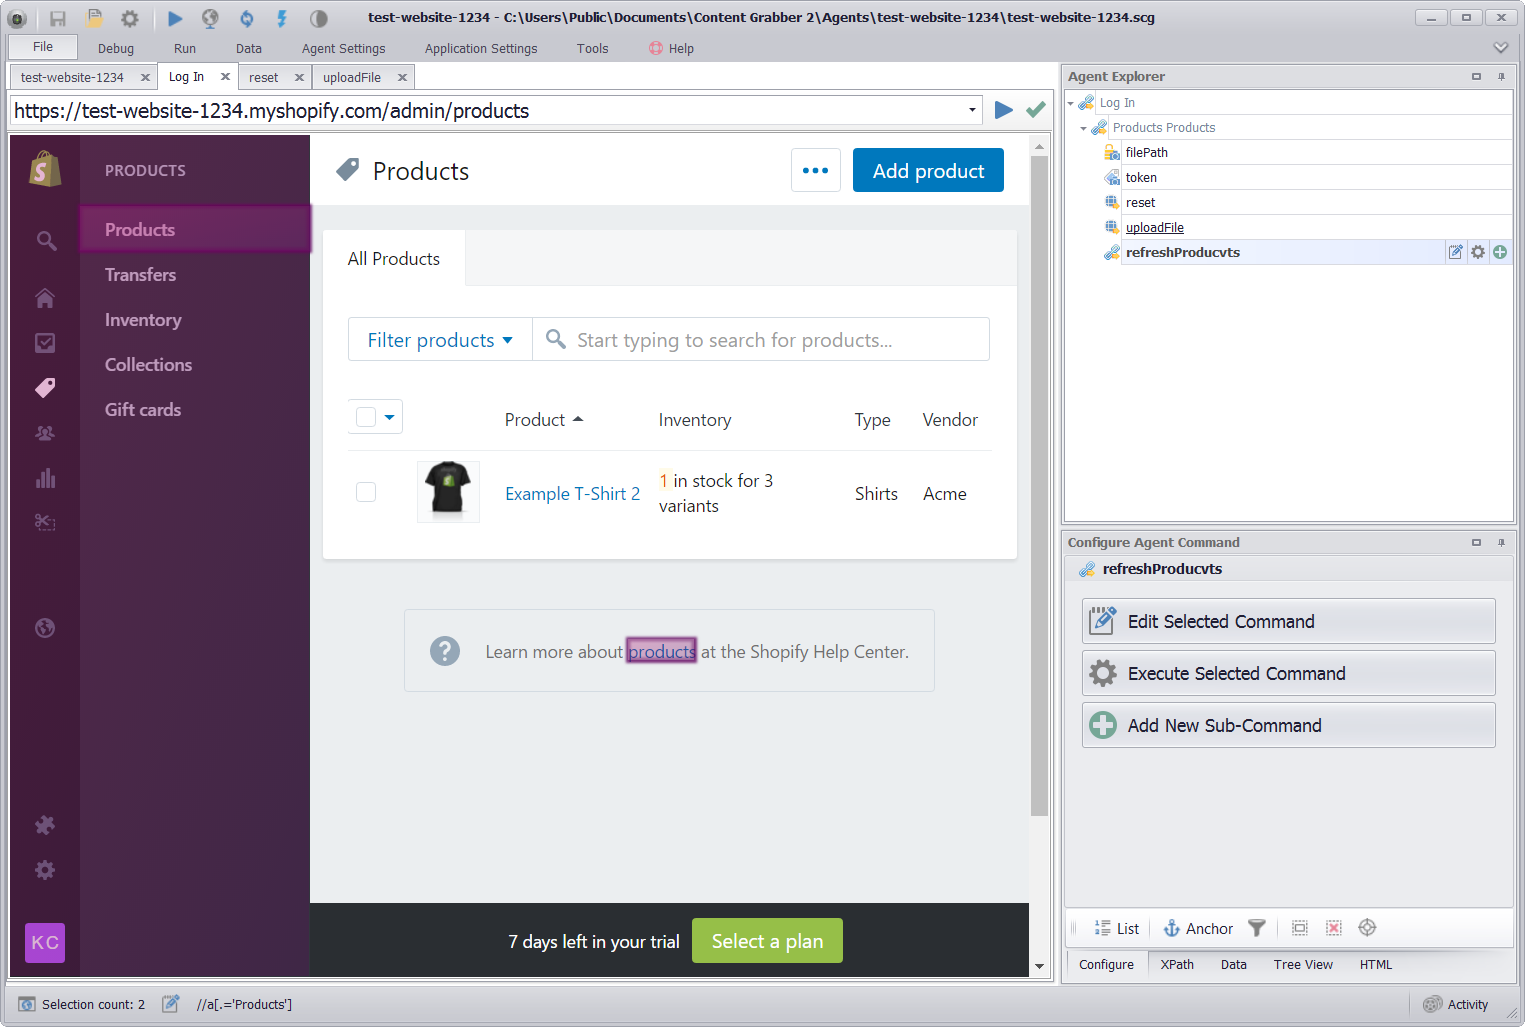
After importing the data, I use a Navigate Link command to click on the Product link, which refreshes the products on the page
Conclusion
Uploading files to web sites can be nearly impossible, but Sequentum Enterprise makes it as easy as it can possibly be. You still need some basic technical skills to examine and understand the web requests, but no programming is required, and Sequentum Enterprise provides excellent tools to help complete the most difficult steps.